
Safety Equipment For Drivers
Every driver should carry safety equipment for emergencies.
REFLECTOR TRIANGLE
A reflector triangle is a bright, reflective warning sign placed on the road to alert other drivers when your vehicle has stopped because of a breakdown or an emergency.
Applicable to all vehicles except motorcycles.
WHY DO WE USE IT?
To warn other road users that there is a stationary vehicle ahead.
To reduce accidents at the scene of a breakdown.
To keep you and your passengers safe.
WHEN SHOULD YOU USE A REFLECTOR TRIANGLE?
Use it when:
Your vehicle breaks down.
You have a puncture tyre.
You are involved in a minor accident.
Your vehicle is blocking part of the road.
HOW TO PLACE A REFLECTOR TRIANGLE
Switch on your hazard lights.
Get out safely and walk behind your vehicle.
Place the triangle at least 45–60 meters behind your vehicle on highways, or about 30 meters on low-speed roads.
Make sure it is visible to approaching vehicles.
On bends or hills, place it further back so drivers see it early.
SAFETY TIPS
Always face oncoming traffic when placing the triangle.
Do not stand in the road.
Use more than one triangle if you have them.
In poor visibility (fog, rain, night), place it further away.
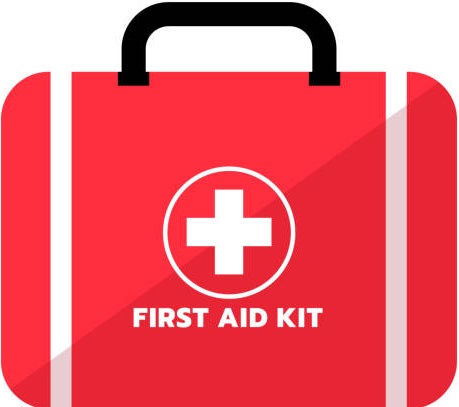
FIRST AID KIT
A vehicle first aid kit is designed to provide immediate medical assistance in case of accidents or minor injuries while traveling.
It helps manage injuries until professional medical help arrives.
IMPORTANCE
Treats minor cuts, burns, bruises, and abrasions.
Manages injuries in road traffic accidents before professional help arrives.
Can save lives in emergencies.
Ensures compliance with road safety regulations in many countries.
COMMON CONTENTS
A standard vehicle first aid kit usually contains:
Wound care
Adhesive bandages (various sizes)
Sterile gauze pads and rolls
Adhesive tape
Antiseptic wipes or solution
Cotton balls or swabs
Burn dressings or gel
Tools & accessories
Scissors
Tweezers
Safety pins
Disposable gloves (preferably nitrile or latex-free)
Face mask (for cpr or infection control)
Medications
Painkillers (like paracetamol or ibuprofen)
Antihistamines (for allergic reactions)
Oral rehydration salts (for dehydration)
Note: avoid including prescription medicines unless recommended by a professional.
Emergency items
First aid manual or instruction sheet
Emergency blanket (thermal blanket)
Instant cold packs
Cpr face shield
GUIDELINES FOR USE
Keep the kit easily accessible, not in the trunk under heavy luggage.
Check contents regularly; replace expired or used items.
Learn basic first aid to use the kit effectively.
Keep the kit sealed and clean to avoid contamination.
STORAGE & MAINTENANCE
Store in a cool, dry place away from direct sunlight.
Ensure all passengers know its location.
Replenish items after each use.
LEGAL REQUIREMENTS
Some countries require vehicles to carry a first aid kit by law (e.g., eu countries, some african nations).
Non-compliance may lead to fines or penalties.
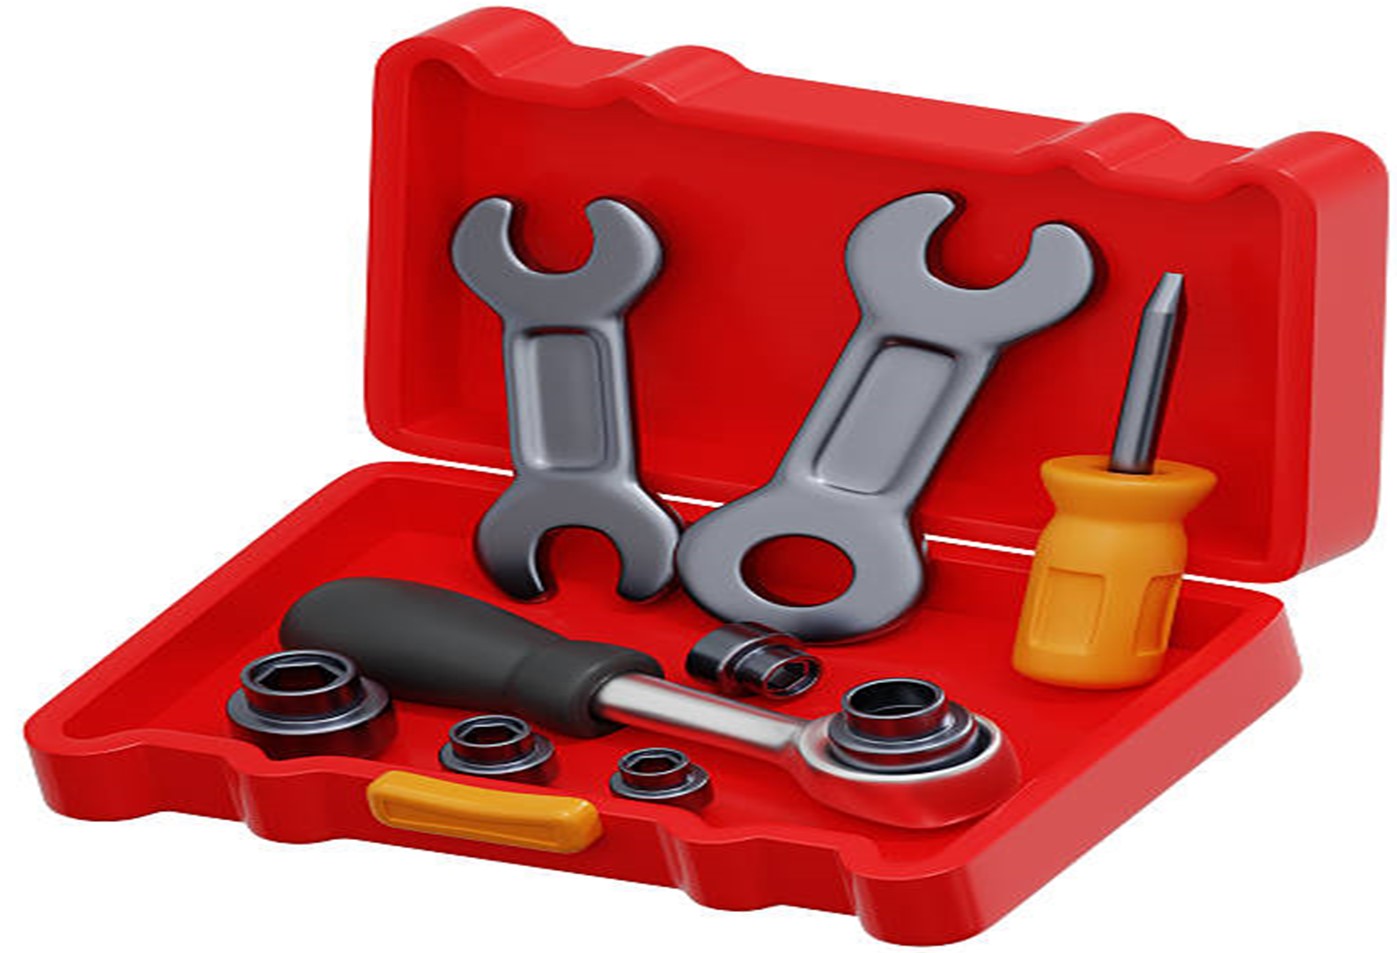
VEHICLE TOOL BOX
A set of essential tools kept in a car to help a driver handle small mechanical problems, emergencies, and basic maintenance while on the road.
Every vehicle should have a well-equipped tool box to improve safety and reduce breakdown risks.
WHY A VEHICLE TOOL BOX IS IMPORTANT
Helps in handling minor breakdowns.
Saves time when roadside assistance is far.
Increases the vehicle’s safety and reliability.
Useful during emergencies such as flat tyres or loose battery terminals.
COMMON ITEMS FOUND IN A VEHICLE TOOL BOX
Wheel spanner / lug wrench: Used for loosening or tightening wheel nuts when changing a tyre.
Jack: Helps lift the vehicle safely off the ground.
Screwdrivers (Flat & Star): Used for tightening or loosening screws on various parts.
Pliers: Useful for gripping, cutting, or bending wires and parts.
Adjustable Spanner: For tightening or loosening different sizes of bolts and nuts.
Tow Rope: Used to tow the vehicle in case it breaks down.
Jumper Cables: For boosting a dead battery using another vehicle.
Tyre Pressure Gauge: Helps check if tyre pressure is correct.
Torch / Flashlight: Important for night emergencies or checking under the vehicle.
First Aid Kit: For treating minor injuries during a breakdown.
Reflective Triangle / Warning Triangle: Placed behind the vehicle to warn other road users during breakdowns.
Gloves: Protect your hands while working on the vehicle.
ADDITIONAL USEFUL ITEMS
Insulation tape
Small hammer
Spare bulbs and fuses
Utility knife
Portable air compressor
Fire extinguisher (1 kg)
TIPS FOR MAINTAINING A VEHICLE TOOL BOX
Check tools regularly to ensure they are not damaged.
Keep the tools clean and dry to prevent rust.
Replace missing or worn-out tools.
Store the tool box in a secure, easily accessible place in the vehicle.
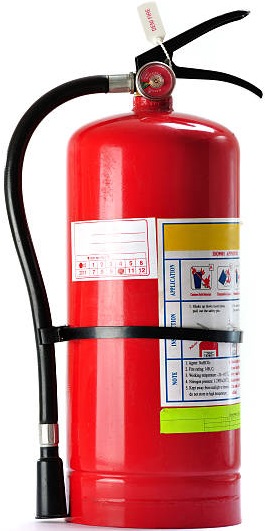
FIRE EXTINGUISHER
A fire extinguisher is a portable device used to control or put out small fires in emergency situations.
It is designed for quick, early action before a fire becomes too large.
TYPES OF FIRES (FIRE CLASSES)
Different extinguishers are made for different types of fires:
Class A: Solid materials (wood, paper, cloth, plastics).
Class B: Flammable liquids (petrol, oil, paint, diesel).
Class C: Flammable gases (LPG, propane).
Class D: Metals (magnesium, aluminum).
Class F/K: Cooking oils and fats (kitchens).
TYPES OF FIRE EXTINGUISHERS
Water extinguisher (red label)
Used for Class A fires only.
Not safe on electrical, liquid, or gas fires.
Foam extinguisher (cream label)
For Class A and B fires.
Smothers the fire by cutting off oxygen.
Dry powder extinguisher (blue label)
Works on Class A, B, C
Good for electrical fires.
Very effective but creates dust, reducing visibility.
Co₂ extinguisher – carbon dioxide (black label)
Ideal for electrical fires and Class B fires.
Leaves no residue.
Safe for computers and electronics.
Wet chemical extinguisher (yellow label)
For Class F (cooking oils and fats).
Used in commercial kitchens.
Forms a foam blanket that cools and smothers the fire.
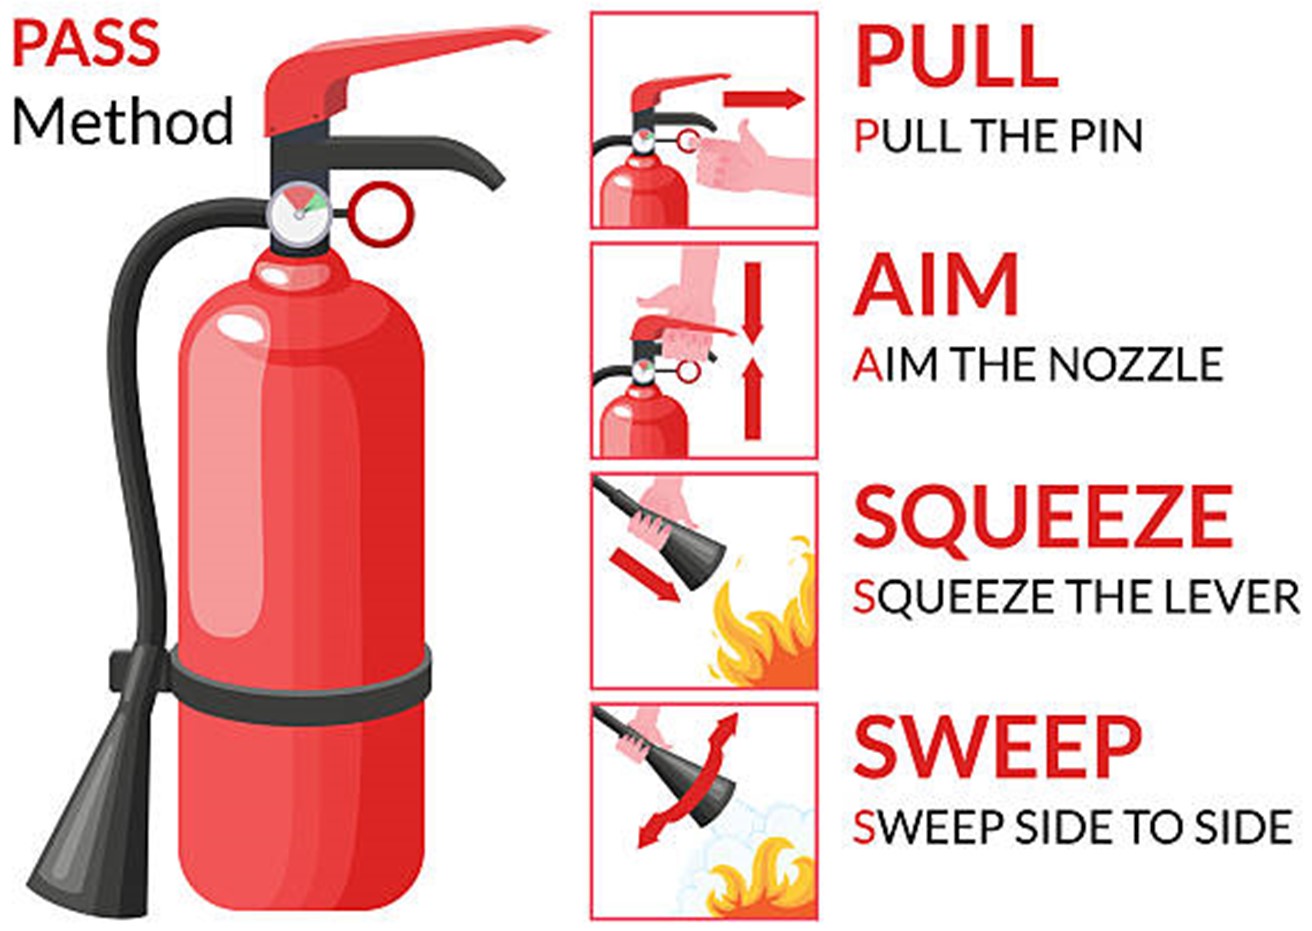
HOW TO USE A FIRE EXTINGUISHER / PASS METHOD
P – Pull the safety pin.
A – Aim the nozzle at the base of the fire.
S – Squeeze the handle to release the agent.
S – Sweep the nozzle side to side until the fire is out.
WHEN TO USE A FIRE EXTINGUISHER
Use ONLY if:
The fire is small and contained (e.g. waste bin).
You know the correct type of extinguisher.
Your exit is clear and behind you.
You have been trained or understand the PASS method.
WHEN NOT TO USE A FIRE EXTINGUISHER
Fire is too large or spreading quickly.
Smoke is filling the room.
You are unsure of the fire type.
Your exit may be blocked.
You feel unsafe or untrained.
NOTE: In these cases, evacuate immediately and call emergency services.
SAFETY TIPS
Keep extinguishers visible and accessible.
Check pressure gauge monthly.
Do not block extinguisher storage areas.
Train staff or family members how to use them.
Secure extinguishers in vehicles and workplaces.
FIRE AXE
A critical safety and emergency tool designed to help occupants respond quickly in case of a fire, accident, or other emergency situations.
It is commonly found in commercial vehicles, buses, trucks, and some private vehicles, especially where safety regulations require emergency equipment.
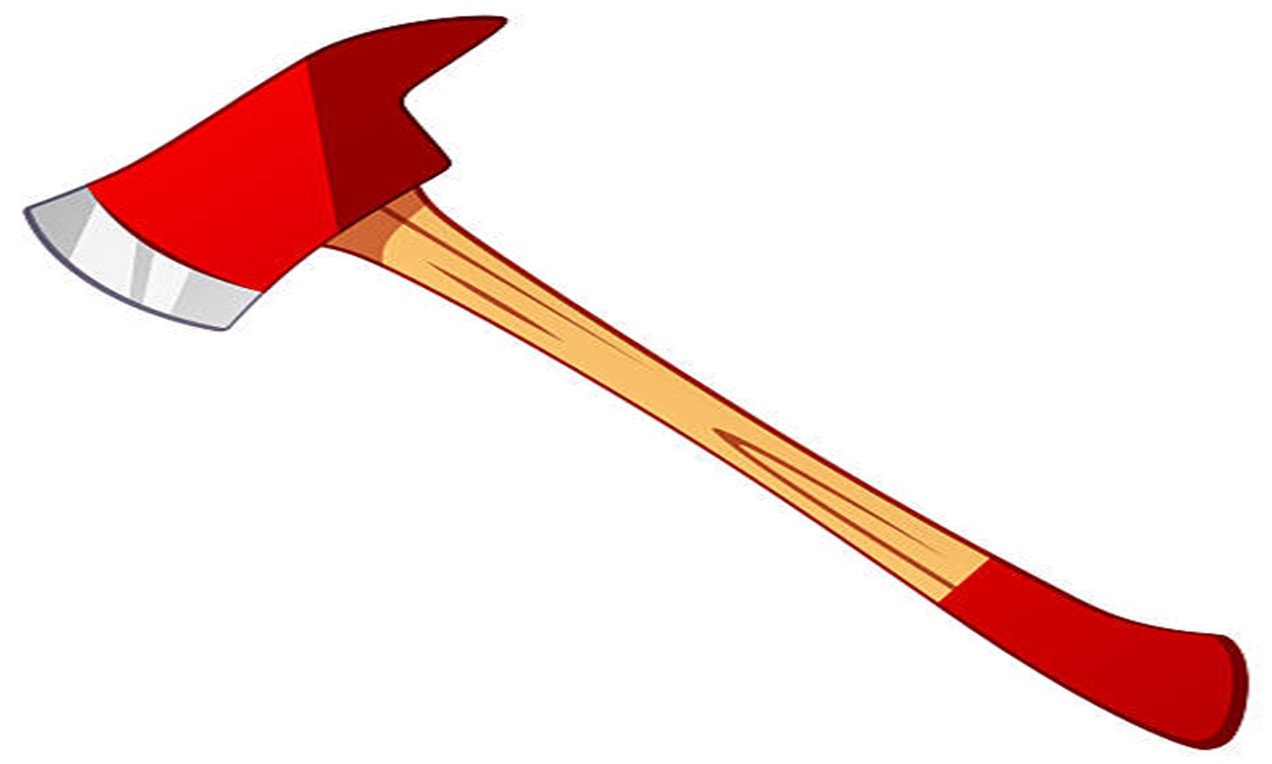
Construction: Usually made of high-quality steel for the blade and a durable, often wooden or fiberglass, handle.
Blade design: One side is a sharp axe blade for cutting or chopping; the other side may have a pick or hammer head for breaking glass or puncturing surfaces.
Size: Typically small and compact for storage in a vehicle but heavy enough to perform effectively.
USES IN VEHICLES
Breaking glass – Quickly break windows in emergencies (fire or accident) to evacuate passengers.
Cutting materials – Chop through branches, seat belts, or other obstacles during rescue operations.
Firefighting support – Create access to a fire source, remove debris, or ventilate areas for smoke escape.
Rescue operations – Help extricate trapped passengers when doors are jammed or deformed.
SAFETY TIPS
Always store the fire axe in a secure, easily accessible location, often marked in emergency kits.
Keep the blade covered with a protective sheath when not in use to prevent injuries.
Only trained personnel should use it to avoid accidents.
Inspect periodically for rust, loose handle, or damage.
REGULATIONS
Many countries mandate carrying a fire axe in commercial vehicles, especially buses and trucks.
Should comply with local safety standards and be part of the vehicle’s emergency equipment kit.
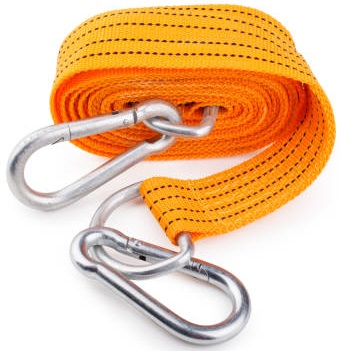
TOW ROPES
A tow rope is a strong, flexible rope designed to connect one vehicle to another in order to tow or pull a disabled vehicle.
It’s an essential item for roadside emergencies, off-road adventures, or vehicle recovery.
TYPES OF TOW ROPES
Nylon Tow Ropes
Stretchable, absorbs shock.
Good for lighter vehicles.
Can reduce jerking between vehicles.
Polyester Tow Ropes
Less stretch than nylon.
Strong and durable.
Resistant to UV rays and water.
Tow Straps / Recovery Straps
Made from heavy-duty nylon.
Wider than standard ropes; distributes force better.
Often used for off-road recovery.
KEY FEATURES TO CONSIDER
Load Rating / Strength: Ensure the rope can handle the weight of the vehicle being towed.
Length: Typically, 3–6 meters (10–20 ft).
Longer ropes allow safer spacing.
Hooks / Loops: Must have secure hooks or reinforced loops to attach to vehicles.
Material Quality: Resistant to abrasion, heat, and weather.
SAFETY GUIDELINES FOR USING TOW ROPES
Check Vehicle Compatibility: Ensure both vehicles can safely handle towing.
Attach Properly: Use designated towing points on both vehicles. Avoid attaching to bumpers, axles, or suspension parts.
Maintain Distance: Keep enough rope length to prevent sudden jerks.
Drive Slowly and Smoothly: Avoid sudden acceleration or braking. Keep speed under 30–40 km/h.
Use Signals: Communicate between drivers using hand signals or phone.
Avoid Sharp Turns: Tow straight as much as possible.
Check Rope Condition: Replace if frayed, cut, or worn.
WHEN NOT TO USE TOW ROPES
On high-speed roads or highways.
If the towed vehicle is heavily damaged and unsafe.
Without a second competent driver.
ALTERNATIVE TOOLS
Tow chains (for heavy vehicles, but more dangerous).
Tow bars (rigid connection, safer for long-distance towing).
Winches (for off-road or stuck vehicles).
SPARE TYRE
A spare tyre (or spare tire) is an extra tyre carried in a vehicle to replace a flat, damaged, or worn-out tyre in case of emergencies while driving.
It allows the vehicle to be driven safely to a service station or tyre repair shop.

TYPES OF SPARE TYRES
Full-Size Spare
Same size and type as the regular tyres.
Can be used for long distances.
Offers normal handling and performance.
Compact / “Donut” Spare
Smaller, lighter, and takes less storage space.
Designed for temporary, short-distance use.
Usually has a speed limit (e.g., 50 mph / 80 km/h).
Run-Flat Tyres
Special tyres that can be driven for a limited distance even when punctured.
Reduces the immediate need for a spare.
LOCATION IN VEHICLES
Usually stored in the trunk or under the cargo area.
Some SUVs and trucks have it mounted outside at the
Always ensure it is easily accessible in emergencies.
HOW TO USE
Safety First: Pull over safely, switch on hazard lights, and engage the handbrake.
Remove the Damaged Tyre: Loosen the lug nuts, jack up the vehicle, remove the tyre.
Install the Spare: Place the spare tyre on the hub, tighten lug nuts partially, lower the vehicle, then fully tighten the nuts in a crisscross pattern.
Check Pressure: Ensure the spare tyre has sufficient air before driving.
MAINTENANCE TIPS
Check the spare tyre’s air pressure regularly (at least once a month).
Inspect for cracks, dry rot, or damage.
Know your vehicle’s spare tyre specifications.
Replace the spare if it’s old or damaged, even if unused.
SAFETY NOTES
Do not exceed the speed or distance limit for a temporary spare.
Avoid heavy loads when using a compact spare.
Always replace a temporary spare with a regular tyre as soon as possible.
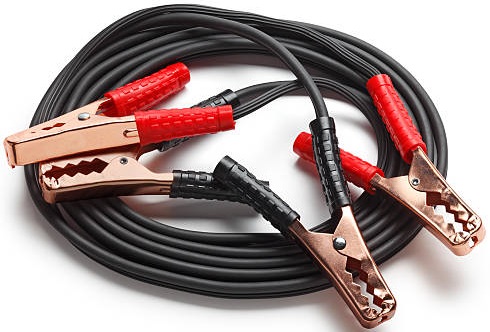
JUMPSTART(BOOSTER) CABLES
Jumpstart cables are heavy insulated wires with metal clamps at each end, designed to transfer electrical power from a working vehicle’s battery to a dead vehicle’s battery so the engine can start.
PURPOSE
Used when a vehicle battery is weak or completely dead.
Supplies temporary power to start the engine.
Common in cold weather, after leaving lights on, or when a battery is old.
PARTS OF JUMPSTART CABLES
Red cable → Positive (+)
Black cable → Negative (–)
Insulated wires → Carry electrical current safely.
Metal clamps → Attach to battery terminals or grounding points.
SAFETY PRECAUTIONS
Ensure both vehicles are turned off before connecting.
Vehicles should not touch each other.
Check batteries for cracks, leaks, or swelling, do NOT jumpstart if damaged.
Keep cables away from fans, belts, and moving engine
Remove any metal jewelry (risk of sparks).
Ensure correct terminal connection. Wrong connections can damage electronics.
HOW TO USE JUMPSTART CABLES (STEP-BY-STEP)
CONNECTING
Red clamp → Dead battery positive (+)
Red clamp → Good battery positive (+)
Black clamp → Good battery negative (–)
Black clamp → Unpainted metal on the dead vehicle (NOT the battery). Example: Engine bracket or chassis bolt.
STARTING THE VEHICLES
Start the working vehicle and let it run for 2–3 minutes.
Try starting the dead vehicle.
If it doesn’t start, wait a few more minutes and try again.
REMOVING THE CABLES (REVERSE ORDER)
Remove black clamp from chassis.
Remove black clamp from good battery (–).
Remove red clamp from good battery (+).
Remove red clamp from dead battery (+).
AFTER THE JUMPSTART
Keep the revived vehicle running for at least 20–30 minutes to recharge the battery.
If the vehicle dies again shortly after, the battery or alternator may need replacement.
COMMON MISTAKES TO AVOID
Connecting positive to negative.
Touching clamps together after connection.
Jumpstarting hybrid/electric vehicles (special procedures).
Attempting to jumpstart from a small motorcycle battery.
SIGNS YOUR BATTERY IS FAILING
Slow engine cranking.
Dim headlights.
Clicking noise when starting.
Electrical accessories failing (radio, dashboard lights).
Battery warning light on the dashboard.
SURVIVAL GEAR
Having proper survival gear in your vehicle can save your life in emergencies such as breakdowns, accidents, bad weather, remote travel, or getting stranded.
The goal is to ensure safety, visibility, communication, and basic survival until help arrives.
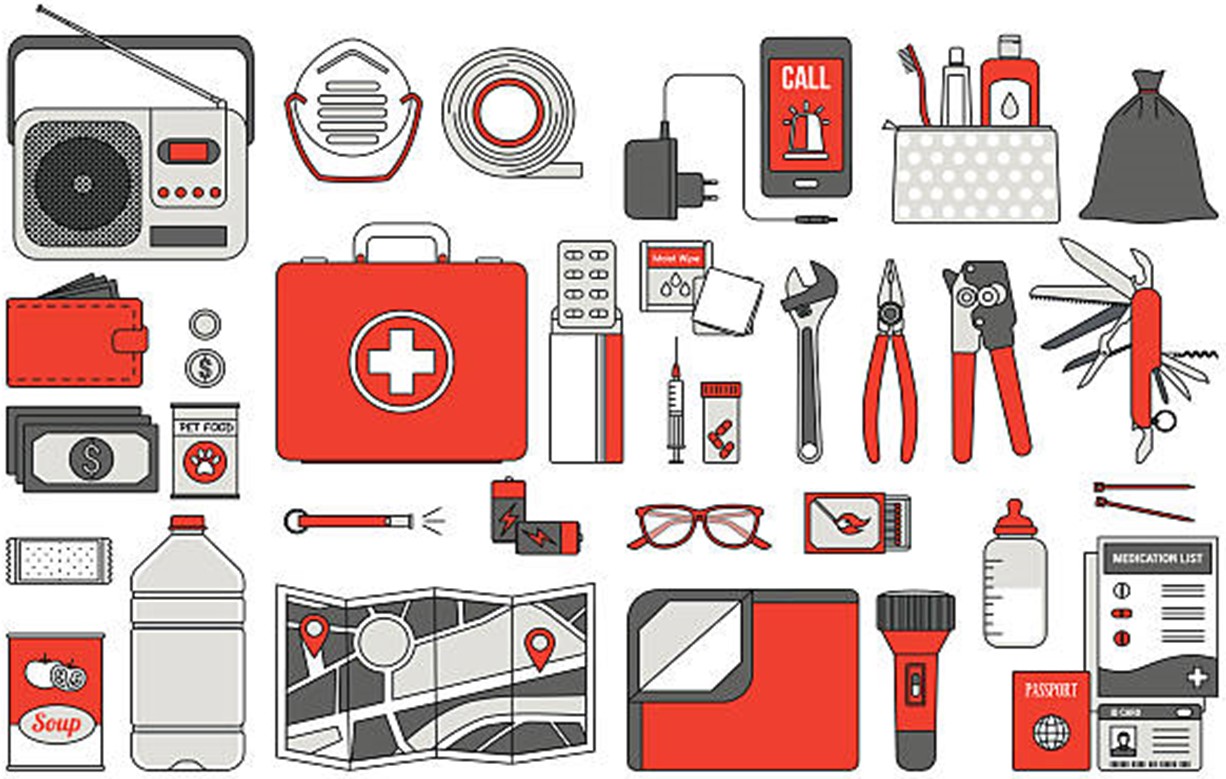
ESSENTIAL SAFETY ITEMS
FIRST AID KIT
Bandages, gauze, antiseptic wipes
Pain relievers
Gloves
Scissors and tweezers
Emergency blanket
Fire extinguisher
Preferably a small ABC dry powder extinguisher
Check pressure and expiry regularly
Warning triangles / reflective cones
Place at least 50–100 metres behind the vehicle
Improves visibility for oncoming motorists
Reflective safety vest: Wear when inspecting the vehicle on busy or dark roads
VEHICLE RECOVERY TOOLS
Jumper Cables: Useful when the battery dies
Tow Rope / Strap: Strong enough for your vehicle’s weight
Tyre Repair Kit: Plugs, patches, and tools for minor punctures
Portable Tyre Inflator / Foot Pump: To refill tyres after repairs or low pressure
Spare Tyre & Jack: Ensure the spare tyre is well inflated and include a wheel spanner.
Multi-Tool / Basic Tool Kit: Screwdrivers, pliers, adjustable wrench
EMERGENCY COMMUNICATION & NAVIGATION
Fully Charged Power Bank: Keep your phone alive during emergencies
Car Phone Charger: Essential for long trips
Flashlight / Headlamp: Preferably LED with extra batteries
Emergency Whistle: Useful if trapped or signalling rescuers
Maps / Offline Navigation App: Helpful in areas with no network coverage
SURVIVAL & COMFORT ITEMS
Drinking Water: At least 2–5 litres, depending on the trip and climate
Non-Perishable Snacks: Energy bars, nuts, dried fruit
Warm Blanket / Thermal Blanket: Helps prevent hypothermia during cold nights
Raincoat / Poncho: Useful when working outside during rainfall
Extra Clothing: Especially warm layers for cold weather
Matches / Lighter: Store in waterproof container
WEATHER-RELATED GEAR
Umbrella: Protection when stepping out during weather events
Ice Scraper / De-icer (Cold Regions): To clear frozen windscreens
Sand / Cat Litter (Slippery Areas): Helps with traction if stuck
DOCUMENTS & CASH
Vehicle Documents: Licence, insurance, logbook copies
Emergency Contact List: Family, police, towing service, ambulance
Small Amount of Cash: Useful when digital payments fail
OPTIONAL BUT HIGHLY USEFUL ITEMS
Portable Jump Starter
Mini Fire Blanket
Seatbelt Cutter & Window Breaker Tool
Emergency Solar Charger
Small Shovel (for mud/sand)
Duct Tape (for quick repairs)
PORTABLE JUMP STARTER
A portable jump starter is a compact, rechargeable device used to start a vehicle when the battery is discharged.
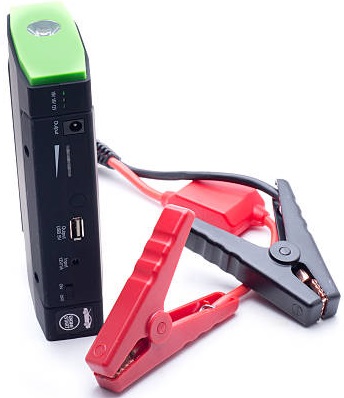
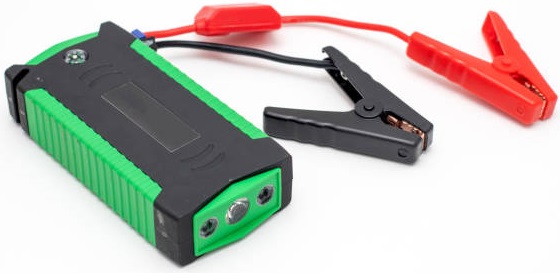
It provides enough power to crank the engine without needing another vehicle or jumper cables.
A portable jump starter is an essential vehicle safety tool. When used correctly, it allows drivers to safely and independently start a vehicle with a dead battery, making it ideal for emergencies, training programs, and daily vehicle preparedness.
Portable jump starters are commonly used in:
Cars and motorcycles
SUVs and light trucks
Emergency roadside situations
HOW A PORTABLE JUMP STARTER WORKS
The jump starter stores electrical energy in an internal battery.
When connected to a vehicle’s battery using clamps, it delivers a short burst of high current to start the engine.
Key terms:
Peak Amps: The maximum power the unit can deliver instantly.
Cranking Amps: The sustained power needed to start the engine.
Cold Cranking Amps: The power required to start an engine in cold conditions.
TYPES OF PORTABLE JUMP STARTERS
Lithium Jump Starters
Lightweight and compact
Easy to store
Common in modern vehicles
Lead-Acid Jump Starters
Heavier and bulkier
Provide strong, steady power
Often used for larger engines
COMMON FEATURES
Most portable jump starters include:
Heavy-duty battery clamps
Built-in safety protection
LED flashlight or emergency light
USB ports for charging phones or devices
Digital or indicator display
Some models may also include:
Air compressor
Power inverter
Emergency warning signals
CHOOSING THE RIGHT JUMP STARTER
When selecting a portable jump starter, consider:
Vehicle size: Larger engines require higher power ratings
Battery type: Lithium units are more portable
Safety features: Spark-proof and reverse-polarity protection
Additional functions: USB charging, lighting, or inflation
ADVANTAGES OF PORTABLE JUMP STARTERS
No need for another vehicle
Easy to carry and store
Quick emergency solution
Useful as a power bank
Reduces roadside breakdown stress
SAFETY PRECAUTIONS
Read and follow the manufacturer’s instructions
Connect clamps correctly: positive to positive, negative to ground
Do not use on damaged or leaking batteries
Keep the unit charged and stored in a dry place
Disconnect immediately after the engine starts
MINI FIRE BLANKET
A mini fire blanket is a small, flame-resistant safety blanket used to smother small fires by cutting off the oxygen supply.
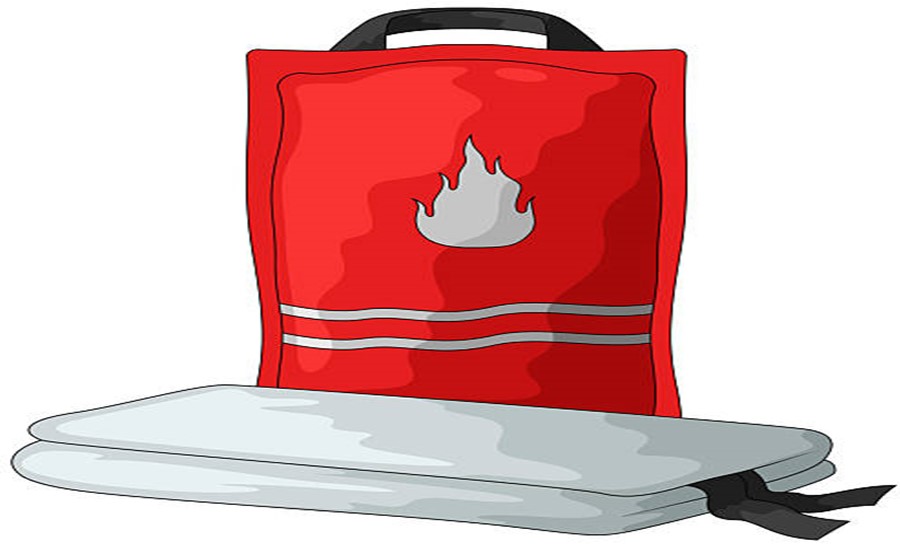

A mini fire blanket is a simple but effective fire-fighting tool for small fires.
It is especially useful in vehicles and confined spaces where fire extinguishers may be difficult to use.
It is designed for quick use in emergencies and is commonly found in vehicles, kitchens, offices, and homes.
HOW A MINI FIRE BLANKET WORKS
Fire needs oxygen to continue burning. When a fire blanket is placed over a flame, it:
Cuts off oxygen
Cools the fire area
Stops the spread of flames
This makes it effective for small fires, especially at the early stage.
COMMON USES OF A MINI FIRE BLANKET
A mini fire blanket can be used to:
Put out small vehicle fires
Extinguish kitchen fires (oil or pan fires)
Smother electrical fires (once power is off)
Wrap around a person whose clothing is on fire
WHERE MINI FIRE BLANKETS ARE USED
Cars and public service vehicles
Driving school training vehicles
Homes and kitchens
Offices and workshops
Fuel stations and small businesses
ADVANTAGES OF A MINI FIRE BLANKET
Easy and fast to use
No chemicals or residue
Safe for electrical and oil fires
Lightweight and portable
Requires little maintenance
HOW TO USE A MINI FIRE BLANKET
Switch off the heat source if safe to do so
Pull the tabs to release the blanket
Hold the blanket in front of your body to protect your hands
Gently place it over the fire, do not throw it
Leave it in place until the fire is completely out
SAFETY PRECAUTIONS
Do not use on large or spreading fires
Keep hands protected behind the blanket
Never reuse a fire blanket once used
Allow the area to cool before removing the blanket
Call emergency services if the fire does not go out
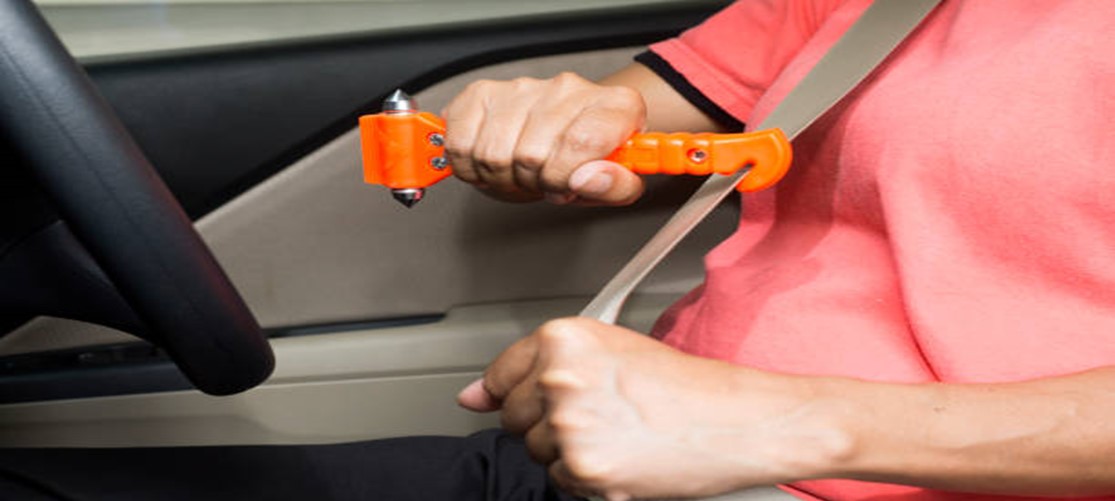
SEAT BELT CUTTER
A seat belt cutter is a small emergency safety tool designed to quickly cut a vehicle seat belt in situations where normal release is impossible, such as after a road accident to allow fast and safe escape from a vehicle when normal seat belt release fails.
It is an important part of vehicle safety equipment and emergency preparedness.
PURPOSE OF A SEAT BELT CUTTER
A seat belt cutter is used to:
Free trapped occupants after a collision
Release a jammed or locked seat belt
Assist injured or unconscious passengers
Enable quick escape from a vehicle in danger
HOW A SEAT BELT CUTTER WORKS
The tool contains a concealed sharp blade inside a protective hook.
When the seat belt is pulled tight and placed in the cutter’s slot, the blade slices through it safely and quickly.
COMMON SITUATIONS FOR USE
After a road traffic accident
When a vehicle overturns
When a seat belt locking mechanism fails
In flooding or fire emergencies
During emergency rescues
ADVANTAGES OF A SEAT BELT CUTTER
Small and easy to carry
Fast and effective in emergencies
Safer than using knives or sharp objects
Can be used with one hand
Reduces rescue time
HOW TO USE A SEAT BELT CUTTER
Support the person’s body to prevent sudden fall
Pull the seat belt tight
Insert the belt into the cutter slot
Pull firmly to cut the belt
Assist the person to safety
SAFETY PRECAUTIONS
Always support the person before cutting
Keep fingers away from the cutting slot
Use only in emergencies
Store the cutter in an easily accessible place
Keep out of reach of children
EMERGENCY SOLAR CHARGER
An emergency solar charger is a portable device that uses sunlight to generate electricity for charging small electronic devices during emergencies when normal power sources are unavailable.
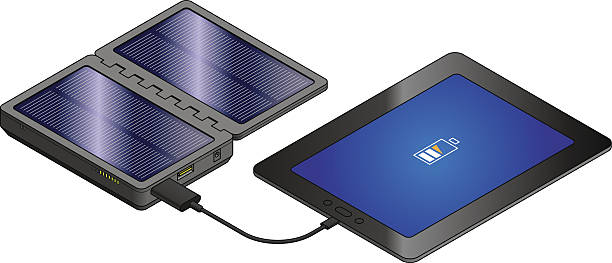
A practical safety tool that provides reliable power for communication and essential devices during emergencies.
It is especially useful during road breakdowns, natural disasters, and in remote locations.
PURPOSE OF AN EMERGENCY SOLAR CHARGER
An emergency solar charger is used to:
Charge mobile phones for emergency communication
Power small devices such as radios, torches, or GPS units
Provide backup power during roadside breakdowns
Support communication during disasters or power outages
HOW AN EMERGENCY SOLAR CHARGER WORKS
The charger has solar panels that convert sunlight into electrical energy.
This energy is either:
Sent directly to a connected device, or
Stored in an internal battery for later use
COMMON FEATURES
Most emergency solar chargers include:
Foldable or compact solar panels
USB charging ports
Built-in rechargeable battery
LED indicator lights
Weather-resistant casing
Some models may also include:
Flashlight or emergency light
Power bank function
ADVANTAGES OF AN EMERGENCY SOLAR CHARGER
Works without fuel or electricity
Renewable and environmentally friendly
Lightweight and portable
Useful in remote or off-grid areas
Reliable backup for emergencies
HOW TO USE AN EMERGENCY SOLAR CHARGER
Place the solar panel in direct sunlight
Ensure the panel is clean and unobstructed
Connect the device using a charging cable
Allow sufficient time for charging
Store charged power safely for later use
SAFETY PRECAUTIONS
Do not expose to extreme heat or water unless designed for it
Avoid placing on vehicle dashboards for long periods
Keep charging ports dry and clean
Do not rely solely on solar charging in poor weather
Check the charger regularly for damage
SMALL SHOVEL (FOR MUD/SAND)
A small shovel is a compact, portable digging vital tool for vehicle safety and emergency preparedness.
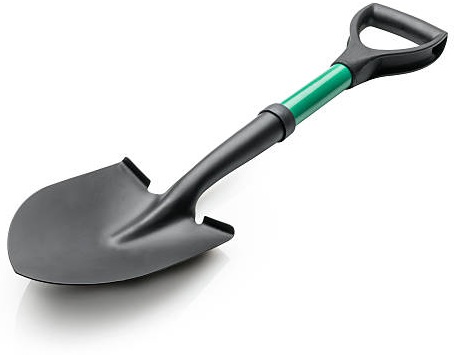
It enables drivers to quickly free a stuck vehicle vehicles that are stuck in mud, sand, snow, or loose terrain and navigate difficult terrain safely.
It is an essential item in off-road kits and roadside emergency equipment.
It is a common item in emergency vehicle kits, especially for off-road driving.
PURPOSE OF A SMALL SHOVEL
A small shovel is used to:
Dig out tires stuck in mud, sand, or snow
Clear debris from under or around a vehicle
Create traction by placing sand, gravel, or other material under tires
Assist in building temporary ramps or pathways
FEATURES OF A SMALL SHOVEL
Compact and lightweight for easy storage
Folding or detachable handle for portability
Durable metal or reinforced plastic blade
Often includes measurement markings or serrated edges for cutting roots or ice
HOW TO USE A SMALL SHOVEL
Assess the situation and determine where digging is needed
Clear loose material in front of or behind the tires
Dig a path for the tires to gain traction
Place sand, gravel, or small rocks under tires if necessary
Work carefully to avoid injury or damage to the vehicle
ADVANTAGES OF A SMALL SHOVEL
Portable and easy to store in a vehicle
Useful in multiple emergency situations
Can assist in preventing further vehicle damage
Versatile tool for off-road and roadside emergencies
SAFETY PRECAUTIONS
Use gloves to avoid cuts or blisters
Dig away from the vehicle to prevent scratches or dents
Avoid overexertion when moving heavy mud or sand
Store securely to prevent injury during travel
Ensure proper footing to avoid slipping
DUCT TAPE (FOR QUICK REPAIRS)
A strong adhesive tape, versatile essential emergency tool for drivers used for temporary repairs and securing items.

It is a common component of vehicle emergency kits because of its ability to fix minor problems quickly.
It allows quick, temporary fixes to vehicle parts or equipment, helping maintain safety and functionality until proper repairs can be made.
PURPOSE OF DUCT TAPE
Duct tape can be used to:
Temporarily fix torn or damaged vehicle parts (e.g., hoses, bumpers, or mirrors)
Secure loose items inside or outside the vehicle
Hold broken windows or lights until proper repair
Bundle or attach emergency tools and equipment
FEATURES OF DUCT TAPE
Strong adhesive that sticks to most surfaces
Durable and resistant to water and abrasion
Flexible and easy to tear by hand
Can be used in a wide range of temperatures
HOW TO USE DUCT TAPE
Clean the surface to remove dust or grease
Cut or tear the tape to the required length
Press firmly onto the damaged area
Ensure edges are sealed for better adhesion
Replace with proper repairs as soon as possible
ADVANTAGES OF DUCT TAPE
Quick and easy to use in emergencies
Lightweight and portable
Can temporarily solve a variety of problems
Does not require tools for use
Versatile for both vehicle and personal needs
SAFETY PRECAUTIONS
Use only for temporary repairs
Avoid using on hot or moving engine parts
Keep away from children
Do not rely on tape for critical structural repairs
Remove properly to prevent residue damage
SUMMARY
A good vehicle survival kit allows you to:
Stay safe
Stay warm and hydrated
Communicate
Make minor repairs
Signal for help
Survive until rescue arrives