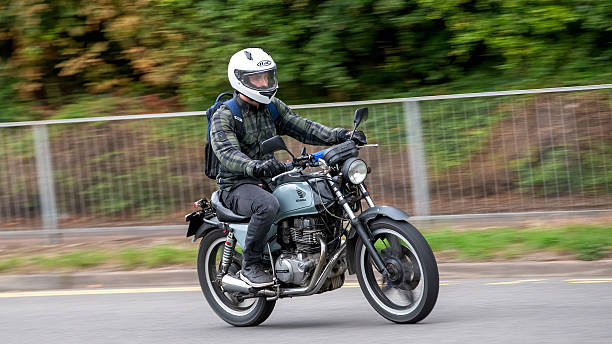
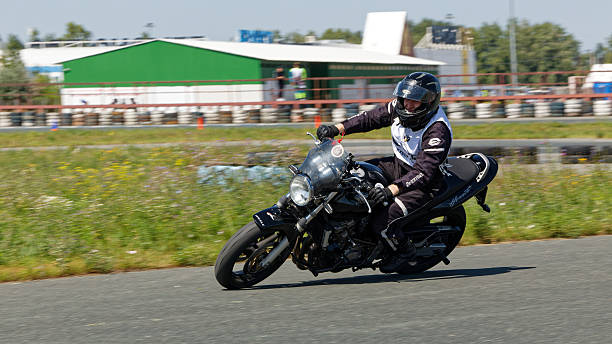
How To Ride A Motorcycle
HOW TO START A MOTORCYCLE
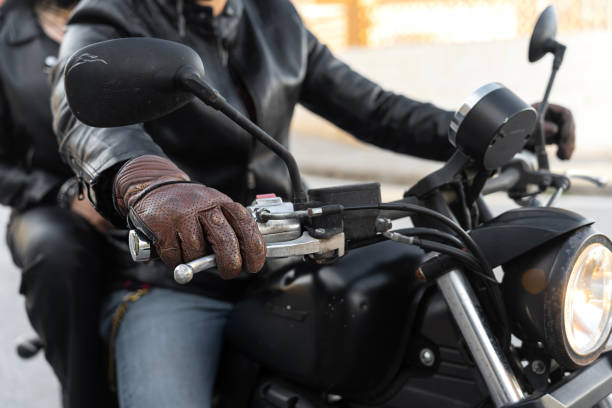
Starting a motorcycle requires coordination of the ignition, clutch, gears, and throttle.
Proper technique ensures safety and smooth control from the start.
Insert the key and turn it on.
Check if the neutral indicator light is on.
If not, shift to Neutral using the gear lever.
Kick-start or press the electric start button, depending on the motorcycle type.
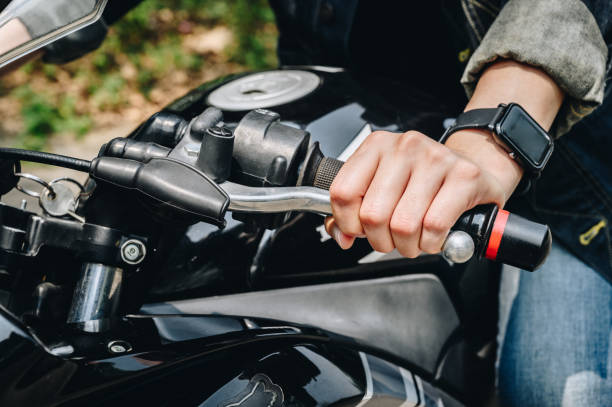
Hold the clutch lever on the left handle.
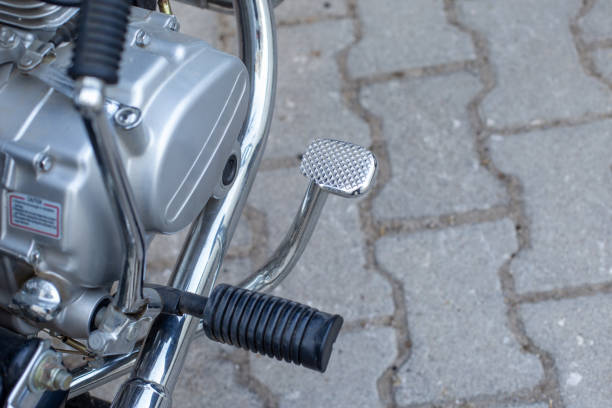
Press the gear lever down with your left foot to select first gear.
Ensure the kickstand or center stand is fully lifted before moving.
Gradually release the clutch while gently applying the throttle.
Balance the motorcycle as it begins to move.
Once balanced, release the clutch completely and accelerate smoothly to your desired speed.
SAFETY TIPS
Always wear a helmet and protective gear before starting.
Make sure the area around the motorcycle is clear before moving off.
Practice smooth coordination of clutch release and throttle for a stable start.
Avoid sudden acceleration to maintain control, especially at low speeds.
CHANGING GEARS UP
Shifting gears upward on a motorcycle allows you to increase speed efficiently while maintaining engine performance.
Proper technique ensures smooth acceleration and control.
Pull in the clutch lever fully with your left hand.
Slightly release the accelerator to reduce engine load before shifting.
Lift the gear lever upward with your left foot to engage the next gear.
Gradually release the clutch lever while simultaneously applying the throttle to match engine speed.
Once the clutch is fully released, accelerate smoothly to continue riding at the desired speed.
SAFETY TIPS
Avoid shifting gears abruptly to prevent engine strain or loss of control.
Always keep a steady grip on the handlebars while shifting.
Anticipate road conditions and traffic when deciding to change gears.
Practice smooth clutch and throttle coordination to prevent jerks during acceleration.
CHANGING GEARS DOWN
Downshifting on a motorcycle is used to reduce speed, gain better control, or prepare for stopping.
Proper technique ensures smooth deceleration and prevents engine strain.
Ensure it is safe to reduce speed.
Look ahead for traffic, pedestrians, or obstacles.
Gradually let go of the accelerator to reduce speed smoothly.
Use your left hand to pull the clutch lever fully.
Use your left foot to press down or lift the gear lever to the appropriate lower gear.
The gear should match your current speed for smooth deceleration.
Slowly let the clutch out to engage the lower gear.
Avoid sudden release to prevent jerking or engine braking too harshly.
Apply light throttle as needed to match engine speed with the lower gear.
SAFETY TIPS
Do not downshift at high speeds abruptly; this can lock the rear wheel or cause skidding.
Always coordinate clutch and throttle to maintain smooth control.
Downshift before entering turns or corners to have better control and engine braking.
Practice smooth gear transitions at low speed before attempting high-speed downshifts.
BRAKING AND STOPPING THE MOTORCYCLE
Stopping a motorcycle safely requires coordination of brakes, clutch, and throttle.
Proper shutdown ensures the vehicle is secure and ready for parking.
Gradually let go of the throttle to reduce speed smoothly.
Hold the gear lever and press the clutch to disconnect the engine from the wheels.
Use the foot brake to stop the motorcycle smoothly.
The hand brake is used only when the foot brake is not sufficient or unavailable.
STEPS TO SWITCH OFF
Hold both to keep the motorcycle stable while preparing to stop completely.
Move the gear lever to neutral to disconnect the engine.
Switch off headlights and indicators as needed.
Place the kickstand or center stand down to stabilize the bike.
Switch off the ignition and remove the key.
SAFETY TIPS
Always check surroundings before stopping.
Avoid sudden braking to prevent skidding, especially on wet surfaces.
Ensure the stand is secure before leaving the motorcycle.
Practice smooth coordination of clutch, brake, and gear for safe stopping.
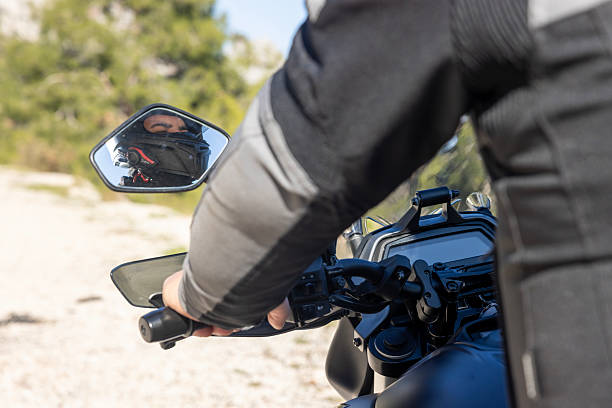
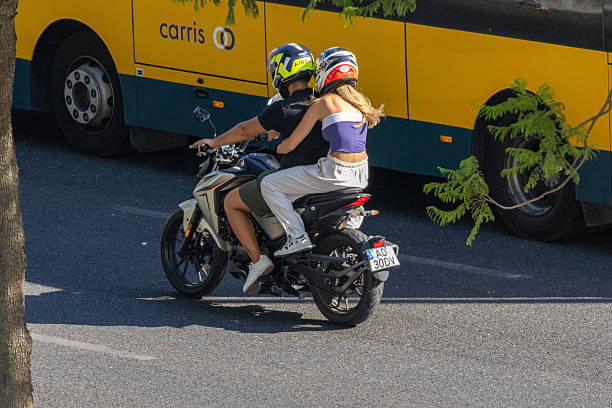
MIRRORS
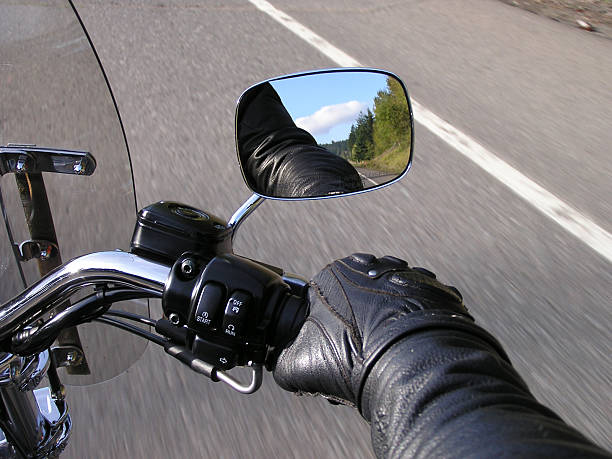
Mirrors help a rider see what is happening behind and beside them without turning their head too much.
Good mirror use improves safety, awareness, and control on the road.
Left Side Mirror – Shows traffic behind and to the left side.
Right Side Mirror – Shows traffic behind and to the right side.
Both mirrors should always be fitted, clean, and properly adjusted before riding.
Sit on the motorcycle in your normal riding position.
Adjust each mirror so that you can see:
A small part of your shoulder or arm (for orientation).
The road behind and the lane beside you clearly.
Avoid adjusting mirrors while riding.
Always do it before moving off.
WHEN TO USE MIRRORS
Check mirrors frequently but especially before and after any of the following actions:
Before moving off from a parked position.
Before changing lanes or overtaking.
Before turning left or right.
Before slowing down or stopping.
Before signaling.
Before entering or leaving a junction.
Before and after overtaking another vehicle.
THE MIRROR–SIGNAL–MANOEUVRE (MSM) TECHNIQUE
Always use the MSM routine to ensure safety:
Mirror: Check mirrors to see if it is safe to act.
Signal: Give the correct signal in good time.
Manoeuvre: Change direction or speed only when safe.
Check over your shoulder (blind spot) before moving sideways, mirrors do not show everything.
IMPORTANCE OF MIRROR OBSERVATION
Helps to avoid collisions from vehicles approaching from behind.
Enables safe lane changes and overtaking.
Prevents accidents caused by sudden stops or turns.
Improves overall situational awareness on the road.
Encourages defensive riding habits.
SAFETY REMINDERS
Always clean your mirrors before every ride.
Replace broken or cracked mirrors immediately.
Do not rely only on mirrors, always combine mirror checks with shoulder glances.
Never make sudden moves without checking mirrors first.
MOTORCYCLES BLIND SPOTS AND SHOULDER CHECKS
BLIND SPOTS
Blind spots are areas behind or beside your motorcycle that cannot be seen in your mirrors.
Even if both mirrors are correctly adjusted, there are still small hidden zones where vehicles can disappear from your view.
These areas are especially dangerous because another vehicle (like a car or truck) could be close to you but invisible in your mirrors.
COMMON BLIND SPOT AREAS
Right and Left Sides: Just behind your shoulders on both sides.
Directly Behind You: A small area not fully visible in the mirrors.
Beside Large Vehicles: Trucks and buses have larger blind spots, avoid riding next to them for too long.
WHY SHOULDER CHECKS ARE IMPORTANT
A shoulder check means quickly glancing over your shoulder to look into your blind spot before you:
Move off from a parked position.
Change lanes.
Turn at an intersection.
Join or leave a main road.
Overtake another vehicle.
Always look where your mirrors cannot see.
HOW TO DO A PROPER SHOULDER CHECK
Check your mirrors first to see what is behind you.
Turn your head slightly (not your whole body) to glance quickly over the shoulder in the direction you plan to move.
Look ahead again immediately to stay in control of your lane.
Only move or turn if it’s safe after checking.
Keep the shoulder check quick and smooth, don’t stare too long away from the road ahead.
WHEN TO PERFORM SHOULDER CHECKS
Before moving off from the roadside.
Before overtaking or changing lanes.
Before turning left or right.
Before entering or leaving a roundabout.
Before pulling over to stop.
Anytime you feel unsure about traffic beside you.
DANGERS OF IGNORING BLIND SPOTS
You might collide with vehicles approaching from behind or alongside.
You may cut off another rider or car during lane changes.
It reduces your awareness of fast-moving traffic behind you.
It’s one of the most common causes of motorcycle accidents.
Always combine mirror checks + shoulder checks before making any move.
Avoid staying in another vehicle’s blind spot.
Keep a safe distance from vehicles ahead and behind.
Practice shoulder checks until they become natural.
Remember, awareness saves lives.
OVERTAKING ON A MOTORCYCLE
Overtaking means passing another vehicle traveling in the same direction on the road.
It allows you to move ahead safely and smoothly, but only when it’s legal, safe, and necessary.
KEY RULES BEFORE OVERTAKING
Always be sure it’s safe, overtaking is one of the most dangerous actions on the road.
Check road signs, some areas prohibit overtaking, especially near bends, junctions, hills, or pedestrian crossings.
Never overtake where visibility is poor or where you might force another vehicle to brake or swerve.
THE MSM AND PSL ROUTINE
Before overtaking, always apply these steps:
Check rear and side mirrors to see what’s behind.
Perform a shoulder check to cover blind spots.
Clearly signal your intention to overtake using your indicator.
Give enough time for other drivers to notice your signal.
Move out smoothly when it’s safe to do so.
Overtake quickly but safely, do not linger beside the
POSITION, SPEED, LOOK
Position: Keep enough distance from the vehicle you’re overtaking.
Speed: Adjust your speed before overtaking, don’t accelerate suddenly mid-move.
Look: Keep checking ahead for oncoming traffic and road conditions.
STEPS TO OVERTAKE SAFELY
Check mirrors and shoulder for traffic behind.
Signal your intention early.
Move slightly out to the right to get a clear view ahead.
Make sure no vehicles are overtaking you.
Increase speed smoothly and pass the vehicle safely.
Once you see the full front of the vehicle in your rear-view mirror, signal and move back to your lane.
Cancel your signal once you return safely.

PLACES WHERE OVERTAKING IS DANGEROUS OR ILLEGAL
On bends and corners
At junctions or intersections
Near pedestrian crossings
On hills or near bridges
At railway crossings
Where there are solid white lines
When visibility is reduced (rain, fog, or darkness)
SPECIAL CAUTION WHEN OVERTAKING
Watch for:
Right or changing lanes.
Cyclists near the road edge.
Traveling faster than expected.
Long vehicles, they may take up more space while turning.
Always overtake one vehicle at a time.
Maintain a safe distance, don’t tailgate before overtaking.
Avoid overtaking near junctions or bus stops.
Be visible, stay out of other drivers’ blind spots.
Return to your lane smoothly and early.
If in doubt, do not overtake, patience saves lives.
Check your mirrors to confirm you’ve cleared the other vehicle.
Reduce speed if needed to maintain safe spacing.
Resume your normal riding position and stay alert.
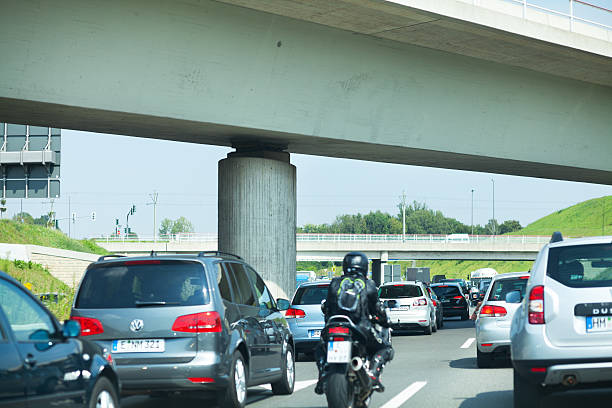
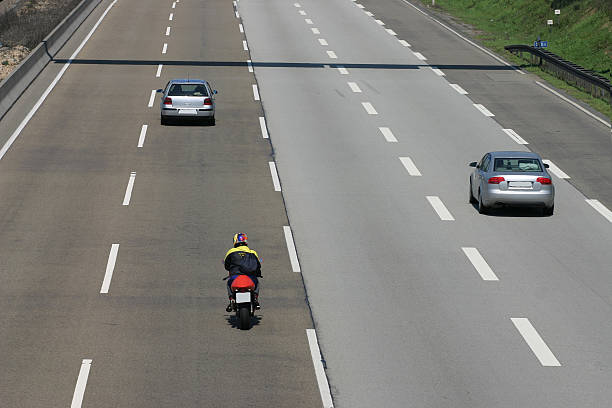
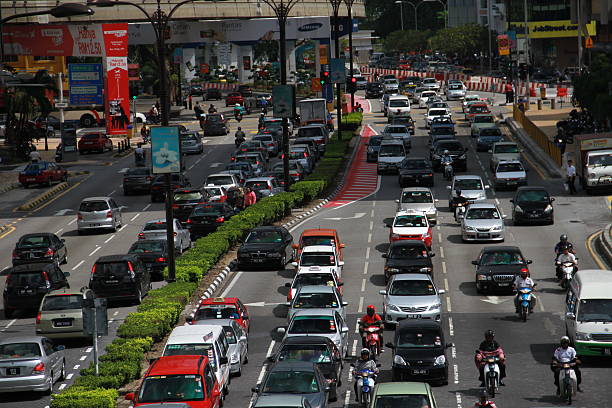
LANE DISCIPLINE AND ROAD POSITIONING
Lane discipline means staying in the correct position within your lane and following the flow of traffic smoothly and safely.
Good lane discipline helps prevent collisions, improves visibility, and keeps traffic moving efficiently.
Always ride within your lane, never weave between vehicles.
Keep a safe distance from other vehicles (both in front and behind).
Do not straddle lane markings or ride in between lanes of traffic.
Use your mirrors and signals before changing lanes or turning.
Follow lane arrows and road markings, they guide your correct path.
Your road position depends on traffic, speed, and visibility.
A good position allows you to see and be seen by other road users.
LEFT LANE (NORMAL RIDING POSITION)
Used for normal travel when traffic is moving freely.
Stay closer to the left-hand side but not too near the edge of the road.
Allows vehicles to overtake you safely from the right.
RIGHT LANE (FOR OVERTAKING OR TURNING RIGHT)
Use only when overtaking or preparing to turn right.
Always signal before moving to or from this lane.
MIDDLE OF THE LANE (PRIMARY POSITION)
Used in towns or busy roads to make yourself more visible.
Prevents vehicles from trying to squeeze past you in the same lane.
Offers a clear view of the road ahead.
POSITIONING FOR DIFFERENT ROAD SITUATIONS
IN URBAN AREAS
Keep slightly to the left-center of your lane.
Avoid riding too close to parked cars, doors can open suddenly.
Watch for pedestrians crossing unexpectedly.
ON RURAL OR OPEN ROADS
Ride towards the center of your lane to improve visibility and avoid roadside hazards like potholes or loose gravel.
Maintain a safe following distance (at least 2 seconds behind the vehicle ahead).
AT INTERSECTIONS
Slow down, check both sides, and position yourself clearly where others can see you.
Use your indicator early to show your intended direction.
Avoid stopping directly beside large vehicles, they may have blind spots.
LANE CHANGES
When changing lanes:
Check mirrors for traffic behind.
Perform a shoulder check for blind spots.
Signal your intention clearly.
Move smoothly into the new lane.
Cancel your signal once you are safely in position.
MAINTAINING SAFE DISTANCE
Keep a 2-second gap behind vehicles in dry conditions.
Extend to 4 seconds in wet or slippery conditions.
Increase distance behind large vehicles like lorries or buses, they block your view and take longer to stop.

AVOID THE BLIND SPOTS
Remember that:
Cars have blind spots on both sides, especially near their rear corners.
Trucks and buses have larger blind spots, so avoid riding beside them for too long.
If you can’t see the driver’s mirrors, the driver can’t see you either.
COMMON LANE DISCIPLINE MISTAKES
Weaving between lanes unnecessarily.
Riding too close to the curb or center line is unsafe and reduces your space to maneuver.
Failing to signal before changing lanes can confuse other drivers and cause collisions.
Overtaking on the left is dangerous because other drivers may not expect you there.
Riding between two moving vehicles puts you at risk if either vehicle shifts lanes.
Staying in another driver’s blind spot makes it harder for them to see you and increases the chance of an accident.
SAFETY TIPS FOR GOOD ROAD POSITIONING
Stay visible at all times.
Adjust your position for better visibility and escape space.
Plan ahead, anticipate bends, turns, and hazards.
Keep both hands on the handlebars and both feet ready for control.
Always position yourself to have a clear view of the road ahead.
BENEFITS OF PROPER LANE DISCIPLINE
Prevents accidents and near misses.
Increases visibility to other road users.
Builds confidence and control.
Ensures smooth traffic flow.
Makes you a predictable and responsible rider.
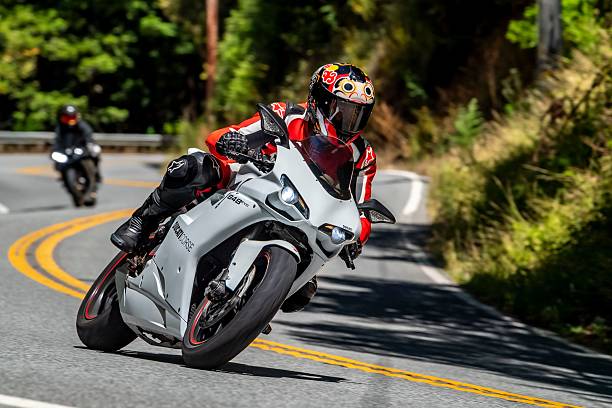
CORNERING AND TURNING TECHNIQUES
Cornering (turning through a bend) is one of the most important riding skills.
It tests your balance, control, and ability to read the road.
Many motorcycle accidents happen on corners because of wrong speed, wrong gear, or wrong position. Learning correct cornering keeps you safe and confident.
UNDERSTANDING CORNERING
Cornering means guiding your motorcycle safely through a bend or turn while maintaining balance, traction, and control.
A well-handled corner uses the right speed, gear, body position, and road line.
Enter the corner at a slow, safe speed.
Once you can see the exit clearly, accelerate smoothly.
Your motorcycle follows your eyes.
Always look through the corner to where you want to exit, not at the obstacles.
Avoid sudden braking, harsh acceleration, or jerky steering.
Smooth control keeps your tires gripping the road.
Never cross the center line or cut corners, always stay in your lane position.
STEPS TO TAKE BEFORE ENTERING A CORNER
Watch for warning signs (e.g., sharp bend ahead, slippery surface, gravel).
Check oncoming traffic and road width.
Judge the sharpness and slope of the bend.
Check your mirrors to ensure no vehicle is overtaking you.
If turning, signal early to inform other road users.
Reduce speed before the corner using both brakes gently.
Avoid braking while leaning, braking mid-turn can cause skidding.
Shift to a lower gear before entering the corner to give power and control.
Keep slight throttle to stabilize your balance.
Keep your eyes on the exit point.
Lean with the motorcycle (not against it).
Maintain a steady throttle to keep the motorcycle balanced.
Do not brake suddenly unless necessary, braking leans the bike upright and can cause loss of grip.
Once you see the road straightening, slowly accelerate.
Return your motorcycle to an upright position.
Check your mirrors again after exiting the bend.
Your body position helps maintain balance and traction.
For gentle bends:
Keep your body upright and lean the bike slightly.
Look through the bend and maintain steady throttle.
For sharp bends:
Shift your upper body slightly into the curve.
Keep your inside knee close to the tank.
Look ahead, not at the ground.
CORNERING ON DIFFERENT SURFACES
Dry roads
You can lean more confidently.
Still, avoid over-speeding, stay in control.
Wet or slippery roads
Slow down before entering the bend.
Avoid hard braking or quick acceleration.
Keep the motorcycle more upright for better grip.
Gravel or uneven roads
Keep a slower, steady speed.
Avoid sudden changes in direction or throttle.
Keep both hands firm on the handlebars.
COMMON MISTAKES TO AVOID
Entering a bend too fast.
Braking or changing gear in the middle of a turn.
Looking down or directly in front of the wheel.
Cutting corners or crossing lanes.
Leaning too much or too little for the curve.
Over-accelerating when exiting the bend.
THE CORRECT LINE THROUGH A CORNER
A safe cornering line gives you the best view, control, and safety margin.
Approach from the left (for a right-hand bend), gives you better view ahead.
Turn towards the center as you enter the curve.
Exit close to the left side of your lane, ready for the next hazard or bend.
(Reverse this for left-hand bends, approach from the right, enter near the center, and exit near the right side of your lane.)
TIPS FOR CONFIDENT CORNERING
Always read the bend early; signs, markings, and landscape help you judge.
Practice slow-speed balance to improve control.
Always look through the corner, not down.
Keep both hands-on handlebars and both feet ready.
Use protective gear, gloves, boots, helmet, for safety.
Practice regularly in a safe area to build confidence.
A skilled rider is not one who rides fast, but one who rides smoothly, safely, and in control through every corner.
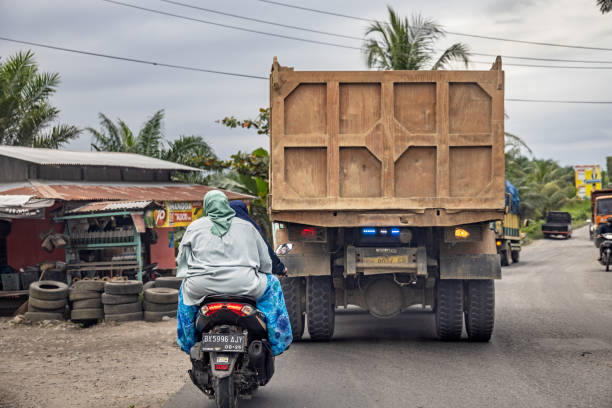
Motorcycles are smaller than other vehicles and can be easily hidden in blind spots or overlooked by drivers.
Being visible is crucial for safety.
Other drivers may not see you due to your small size.
Reduced visibility increases the risk of collisions, especially at intersections, lane merges, and roundabouts.
Proper visibility helps other road users anticipate your movements.
FACTORS AFFECTING VISIBILITY
Time of Day: Riding at dawn, dusk, or night reduces how well other drivers see you.
Weather Conditions: Rain, fog, or dust can obscure your motorcycle.
Road Position: Riding too close to large vehicles can block you from view.
Clothing and Gear: Dark clothing blends into the environment; bright or reflective gear improves visibility.
Lighting: Working headlights, brake lights, and indicators make you easier to spot.
HOW TO IMPROVE YOUR VISIBILITY
Ride where other drivers can see you clearly, avoid blind spots beside large vehicles.
Use the center or slightly left of your lane for better visibility to oncoming traffic.
Keep your headlight on at all times, even during the day.
Use brake lights and indicators properly to signal intentions.
Consider additional reflective strips or auxiliary lights.
Wear bright, fluorescent colors or reflective jackets.
Use a reflective helmet or helmet stickers.
Bright gloves and boots help signal hand and foot movements.
When possible, make eye contact with drivers at intersections or junctions.
This ensures the driver knows you are present.
DEFENSIVE RIDING FOR VISIBILITY
Always assume other drivers may not see you.
Keep a safe following distance from vehicles ahead.
Avoid riding in another vehicle’s blind spot for too long.
Signal early and clearly when turning or changing lanes.
Reduce speed in poorly lit areas.
Keep headlight and taillight clean and functional.
Wear reflective clothing or gear.
Use your horn if needed to alert drivers to your presence.
COMMON VISIBILITY MISTAKES
Riding in the blind spots of larger vehicles.
Failing to use headlights in low light conditions.
Wearing dark clothing that blends with the environment.
Not signaling intentions clearly or in time.
Riding too close to other vehicles, reducing your visibility.
TIPS FOR BEING SEEN
Stay predictable and ride in a position where you are visible.
Signal early for lane changes, turns, or stops.
Use high-visibility gear and helmet markings.
Avoid sudden movements that may confuse other drivers.
Always ride defensively, assuming other drivers may not see you.
The best way to avoid accidents is to be visible and predictable at all times.
If drivers can see you, they can avoid you.
MOTORCYCLE MIRRORS
Usually two side mirrors.
Provide a wider view of vehicles behind.
Must be adjusted correctly for maximum visibility.