
No Breathing, Unconsciousness And Cpr
Introduction to cpr
CPR (Cardiopulmonary Resuscitation) is the most important lifesaving technique that anyone can learn.
Medical professionals are required to relearn CPR every 2 years to keep their skills sharp.
What cpr means
Cardio – Heart
Pulmonary – Lungs
Resuscitation – To revive or restore life
Purpose of cpr
CPR is used when a person’s breathing or heartbeat stops.
It keeps blood flowing to the brain and other vital organs until medical help arrives.
Studies show that performing CPR can increase the chance of survival by 2–3 times in someone who is unconscious and not breathing.
When to perform cpr
The person is unconscious
Non-responsive to verbal or physical stimuli
Not breathing normally (gasping or irregular breathing does not count)
Age variations
CPR techniques differ depending on whether the victim is a baby (0–1 year), child (1–8 years), or adult.
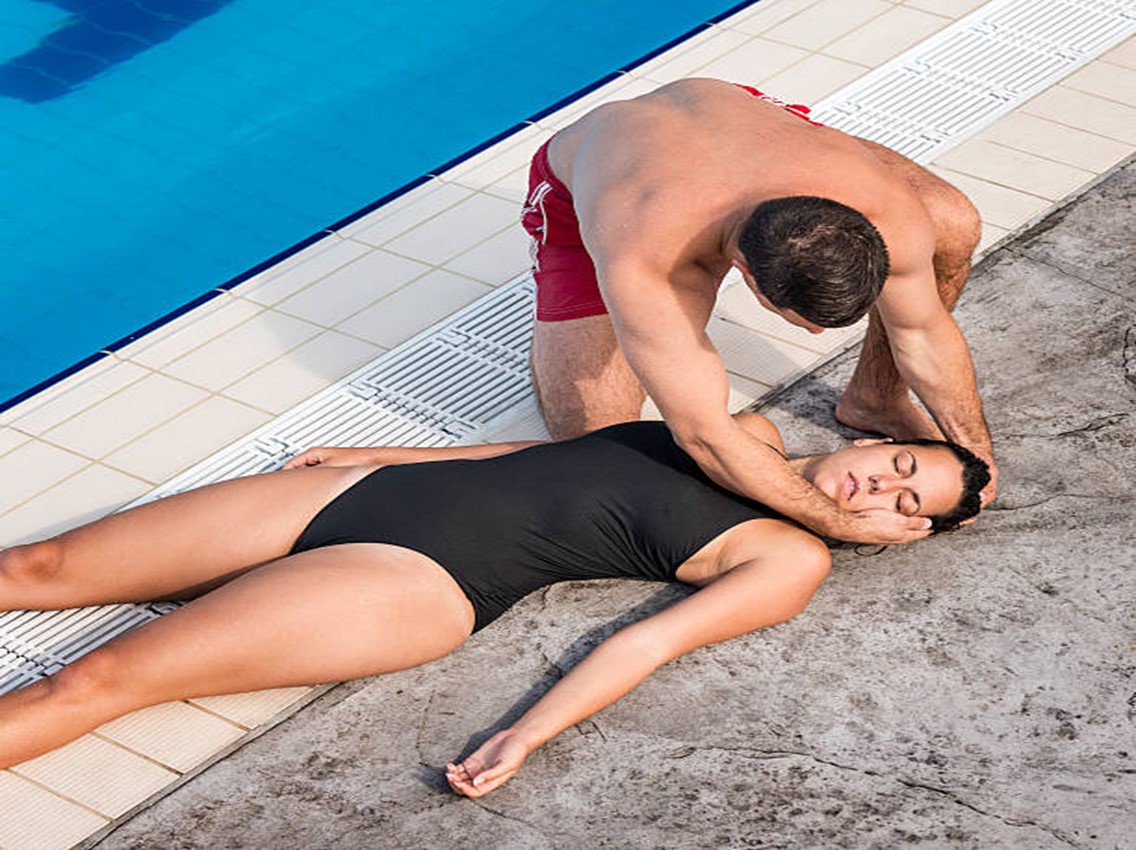
STEPS TO CHECK BEFORE CPR (DR. ABC)
Danger: Ensure the scene is safe for yourself and the victim.
Response: Try to wake the person by tapping their shoulders and asking if they are okay.
Airway: Open the airway using head-tilt, chin-lift (unless a head, neck, or spine injury is suspected).
Check for obstructions such as vomit, blood, or objects.
Breathing: Look, listen, and feel for normal breathing for 10 seconds.
Circulation: Check for a pulse if trained and capable.
If the person is unconscious, not breathing, and has no pulse (or you are untrained in pulse checking):
Begin CPR immediately.
BASIC ADULT CPR (HANDS-ONLY METHOD)
Place the heel of one hand in the center of the chest. Place the other hand on top and interlock fingers.
Keep your arms straight and shoulders directly over your hands.
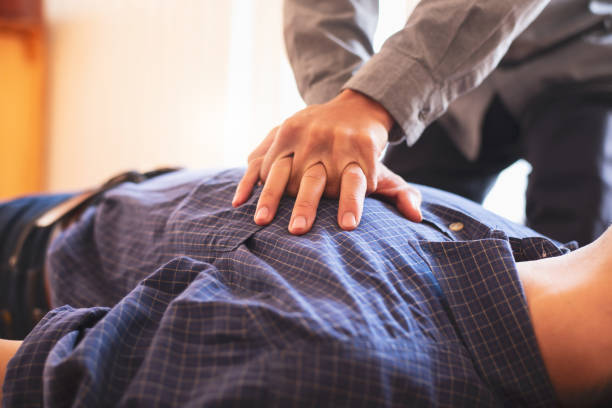
Push hard and fast, compressing the chest about 5–6 cm (2–2.5 inches).
Perform 100–120 compressions per minute.
Allow the chest to fully recoil between compressions.
Continue compressions until:
The person starts breathing normally, or
Medical help arrives, or
You are too exhausted to continue
CPR FOR BABIES AND CHILDREN
Babies (0–1 year): Use two fingers in the center of the chest for compressions, compress about 4 cm (1.5 inches).
Children (1–8 years): Use one or two hands depending on size, compress about 5 cm (2 inches).
Compression rate: 100–120 per minute
After every 30 compressions, give 2 rescue breaths (if trained).
If alone and untrained in rescue breaths, perform hands-only CPR.
Always call or have someone call emergency services before or during CPR.
Continue CPR until help arrives, or the person shows signs of life (breathing or movement).
TEEN AND ADULT CPR
HOW AND WHEN TO DO HANDS ONLY CPR
Use this technique when you see a teen or adult suddenly become unconscious.
Confirm that the person is not breathing normally before starting.
Call for help immediately and have someone contact emergency medical services.
STEP-BY-STEP PROCEDURE
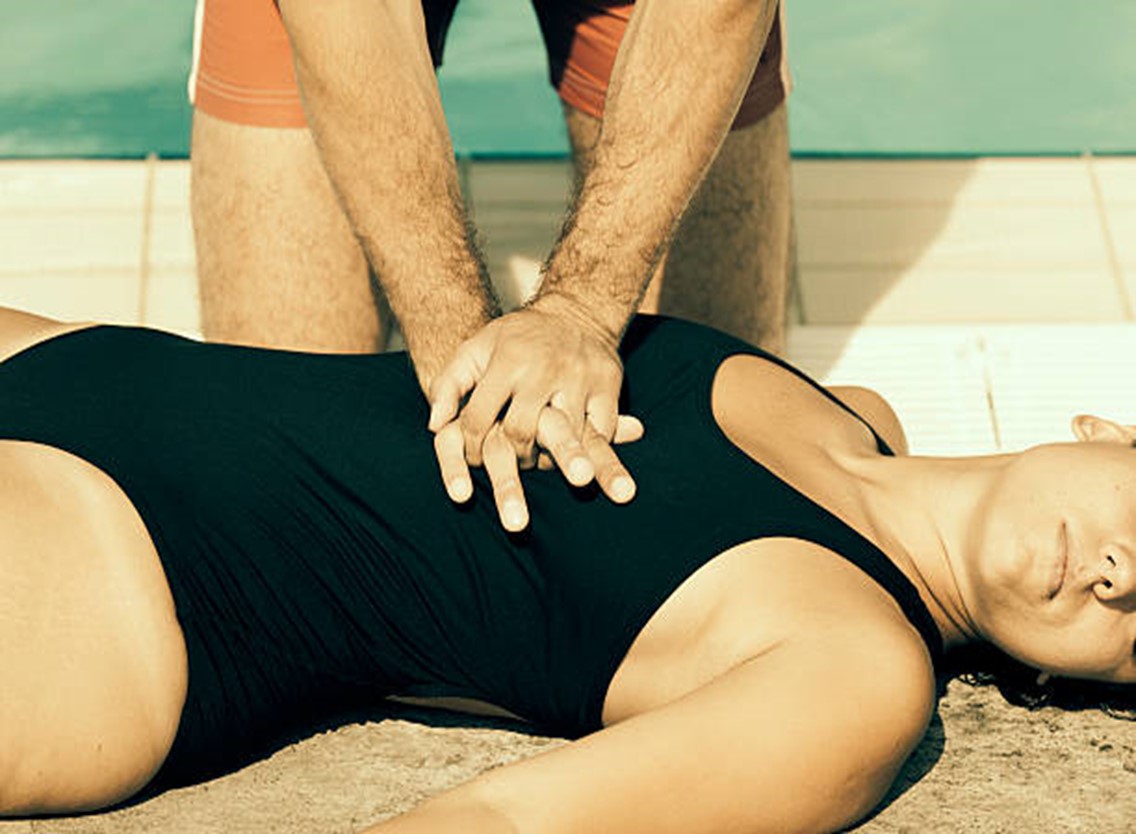
Lay the person on their back on a firm, flat surface.
Kneel beside their shoulders.
Place the heel of one hand in the center of the chest, over the sternum (between the nipples).
Place your other hand on top and interlock your fingers.
Keep your arms straight and shoulders directly above your hands.
Keep your elbows straight and shoulders directly above your hands.
This ensures that your upper body weight, not just your arms, is used to compress the chest effectively.
Push hard and fast, compressing the chest about 5–6 cm (2–2.5 inches).
Perform 100–120 compressions per minute (roughly to the beat of “Stayin’ Alive”).
Allow the chest to fully rise after each compression before pushing down again.
Continue compressions until:
The person starts breathing normally, or
Emergency medical personnel arrive, or
You are too exhausted to continue.
Do not stop CPR for more than a few seconds to check for breathing or pulse.
If you are trained in rescue breaths, after 30 compressions, give 2 breaths.

Ensure the victim is on a firm surface, not a bed or soft couch, for effective compressions.
Hands-only CPR is effective in teenagers and adults, especially in sudden cardiac arrest.
If the victim starts breathing normally, place them in the recovery position.
Continue to monitor ABC (Danger, Response, Airway, Breathing, Circulation) while waiting for help.
HOW TO PERFORM CRP WITH RESCUE BREATHS
WHEN TO USE
Use CPR with rescue breaths if you find a teen or adult unconscious and not breathing normally.
Also use it in cases of drowning, choking, breathing problems, drug overdose, or other causes of unconsciousness.
STEPS TO PERFORM
Lay the person on their back on a firm, flat surface.
Kneel beside the victim’s chest.
Place the heel of one hand on the center of the chest (between the nipples).
Place the other hand on top and interlock your fingers.
Keep elbows straight and shoulders directly above hands.
Push down 5–6 cm (2 inches) at a rate of 100–120 compressions per minute.
After each compression, allow the chest to fully rise.
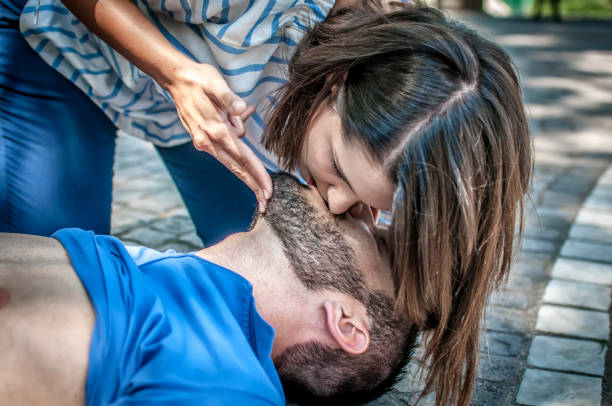
RESCUE BREATHS
After 30 chest compressions, open the airway using the head-tilt, chin-lift
Pinch the person’s nose closed and cover their mouth with yours to make a complete seal.
Give 2 rescue breaths, each lasting about 1 second, watching for the chest to rise.
Repeat 30 compressions followed by 2 breaths.
Do not stop CPR until:
The person starts breathing normally
Medical help arrives and instructs you to stop.
If the victim starts breathing, place them in the recovery position.
Continue to monitor ABC (Danger, Response, Airway, Breathing, Circulation).
If you are untrained or unable to give rescue breaths, perform hands-only CPR until help arrives.
Tilt the head back gently and lift the chin with 2 fingers under the chin.
Make sure the airway is clear of any obstructions (vomit, secretions, or objects).
Pinch the victim’s nose closed.
Place your mouth over the victim’s mouth to create a tight seal.
Blow into the victim’s mouth 2 times.
Each breath should last about 1 second.
Watch carefully for the chest to rise with each breath.
After 2 breaths, immediately continue with 30 chest compressions.

Repeat the cycle of 30 compressions → 2 breaths until:
The victim breathes normally, or
Medical help arrives and instructs you to stop.
Do not pause for more than 10 seconds between compressions and breaths.
If the chest does not rise, reposition the head and try again.
Always monitor ABC (Danger, Response, Airway, Breathing, Circulation).
CHILD AND INFANT CPR
Key differences from teen/adult cpr:
Always include rescue breaths.
Chest compressions are gentler, do not push as hard as for teens or adults.
Hands-only CPR is less effective for children and infants.
Do CPR only when the child or infant is unconscious, non-responsive, and not breathing normally.
If you are not comfortable giving rescue breaths:
Performing compressions alone is better than doing nothing.
Focus on maintaining the flow of blood to the heart and brain.
Children (1–12 years): Use one or both hands (depending on size) to compress the chest.
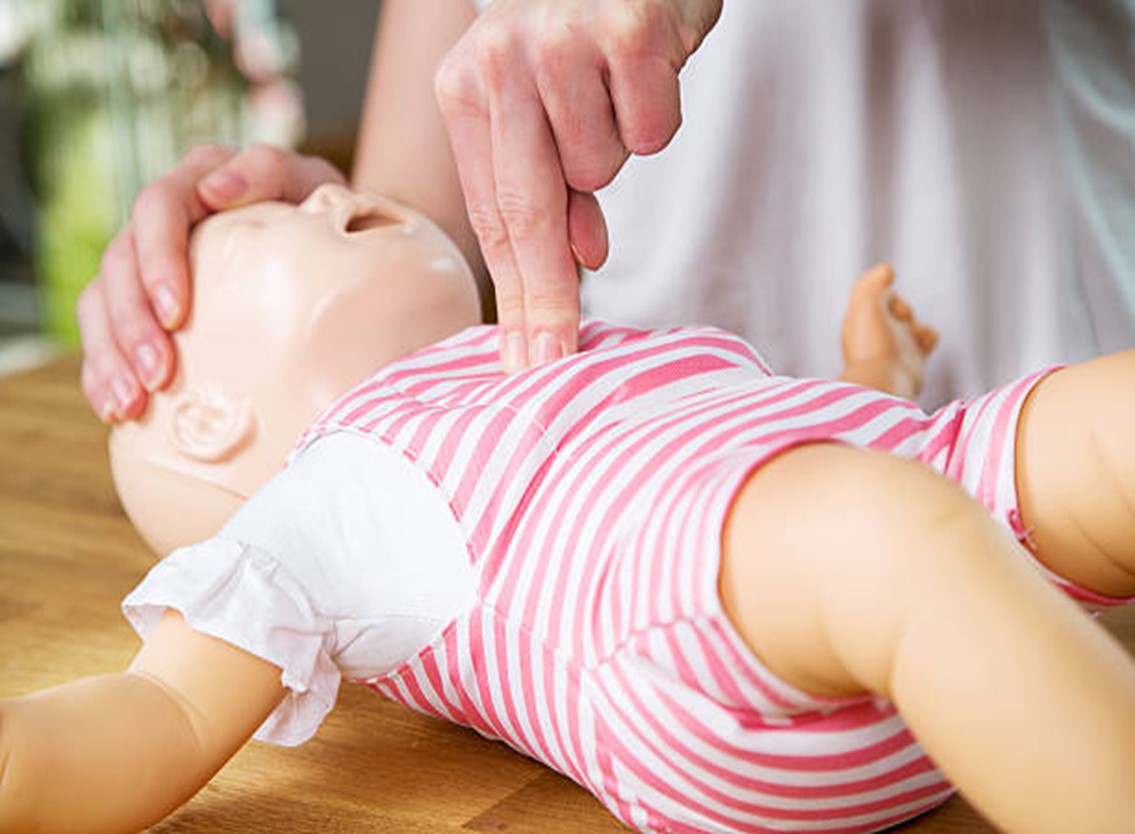
Infants (under 1 year): Use 2 fingers in the center of the chest just below the nipple line.

Children: Compress about 5 cm (2 inches) per push.
Infants: Compress about 4 cm (1.5 inches) per push.
Rate: 100–120 compressions per minute, with rescue breaths after every 30 compressions (or 15:2 if 2 rescuers).
RESCUE BREATHS FOR CHILDREN AND INFANTS
Tilt the head slightly (infants need minimal tilt to avoid blocking the airway).
Cover the mouth (and nose for infants) with your mouth and give 2 gentle breaths.
Each breath should last about 1 second and cause the chest to rise visibly.
Cycle: 30 compressions – 2 breaths for solo rescuer (child/infant).
Continue until:
The child or infant breathes normally, or
Medical help arrives.
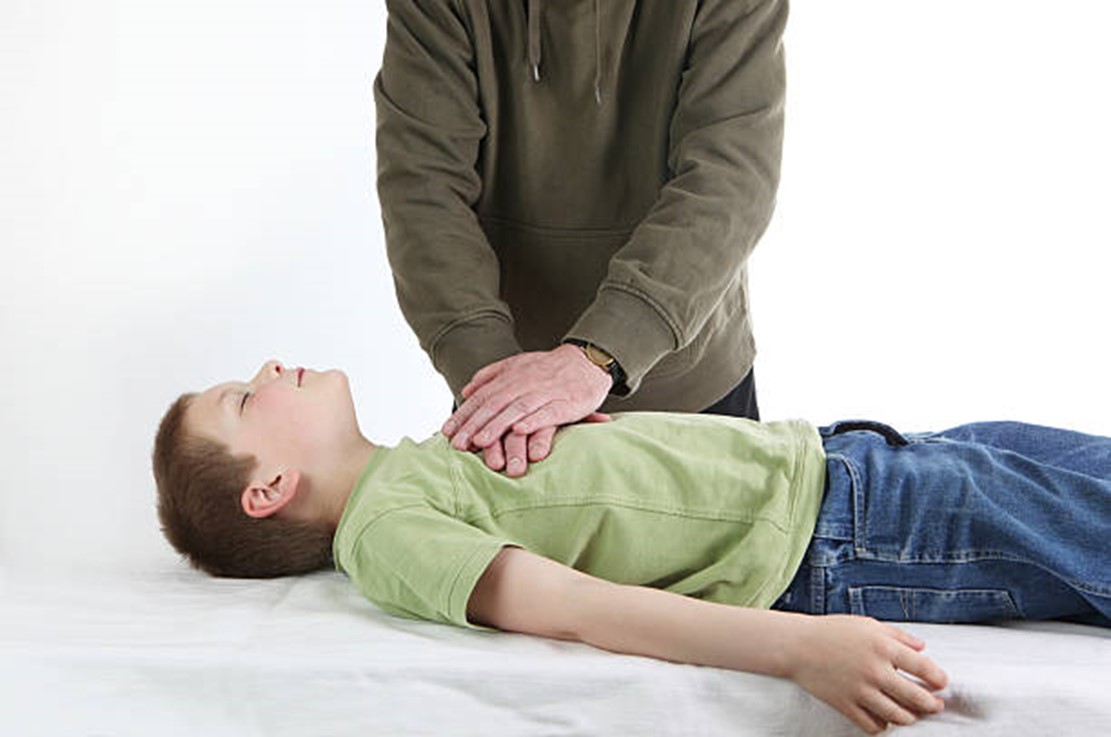
HOW TO PERFORM CHILD CPR (AGES 1-12)
Ask for Help: Have someone call for medical help immediately.
Carefully lay the child on their back on a firm surface.
If a spinal injury is suspected, have two people move the child while keeping the head and neck aligned.
Kneel next to the child’s shoulders.
Place the heel of one hand over the child’s sternum (breastbone) between the nipples.
Use one hand to compress the chest.
Push down to about 1/3 of the chest’s depth.
Rate: 100–120 compressions per minute.
Allow the chest to fully rise after each compression.
RESCUE BREATHS
Tilt the head slightly back to open the airway.
Pinch the nose closed and cover the child’s mouth with yours.
Give 2 gentle breaths, each lasting about 1 second, making the chest rise visibly.
Cycle: Perform 30 compressions → 2 rescue breaths (if one rescuer).
Continue cycles until:
The child begins breathing normally, or
Medical help arrives.
If Uncomfortable Giving Rescue Breaths:
Chest compressions alone are better than doing nothing.
Continue compressions until help arrives.
CHEST COMPRESSIONS
Let the chest rise completely before pushing down again.
Maintain a steady rate of 100–120 compressions per minute.
If you are comfortable, give 2 rescue breaths after every 30 compressions, just like with an adult
Each breath should last about 1 second and make the chest rise visibly.
Do not stop CPR until:
Medical help arrives and instructs you to stop, or
The child starts breathing normally on their own.
RECOVERY POSITION

If the child starts breathing normally, place them in the recovery position.
Continue to monitor ABC (Danger, Response, Airway, Breathing, Circulation).
CPR is most effective when performed without interruption.
Hands-only CPR is better than doing nothing if you are uncomfortable giving rescue breaths.
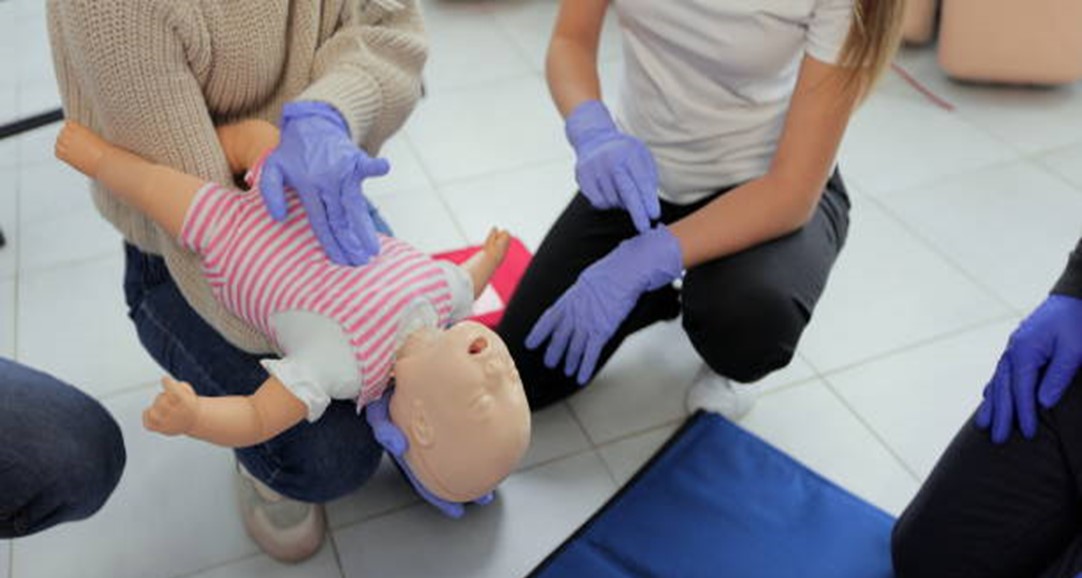
HOW TO PERFORM CPR (AGE LESS THAN 1 YEAR)
Stroke the baby’s foot and shout to see if there is a response.

Avoid tapping the shoulder, as this could injure the baby.
CALL FOR HELP
Ask someone to arrange medical help immediately.
If you are alone, perform CPR for 2 minutes before leaving to call for help.
CHEST COMPRESSIONS
Kneel next to the baby’s shoulders.
Place two fingers on the sternum (breastbone) between the nipples.
Push down about 1/3 the depth of the chest (approximately 4 cm or 1.5 inches).
Allow the chest to fully rise between compressions.
Perform compressions at a rate of 100–120 per minute.
RESCUE BREATHS
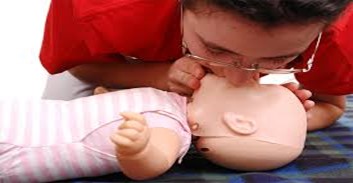
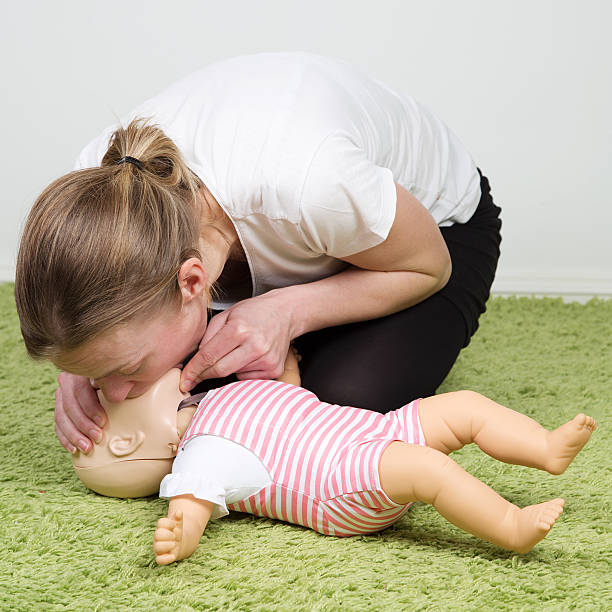
Cover the baby’s mouth and nose with your mouth.
Give 2 gentle breaths after every 30 compressions.
Each breath should last about 1 second and make the chest rise visibly.
Do not stop CPR until:
The baby starts breathing normally, or
Medical help arrives and tells you to stop.
If the baby starts breathing normally, place them on their side in the recovery position.
Continue to monitor ABC (Danger, Response, Airway, Breathing, Circulation).
Be gentle, infants are very fragile.
Only use two fingers for compressions.
Hands-only CPR is not recommended for infants; always try to give rescue breaths.
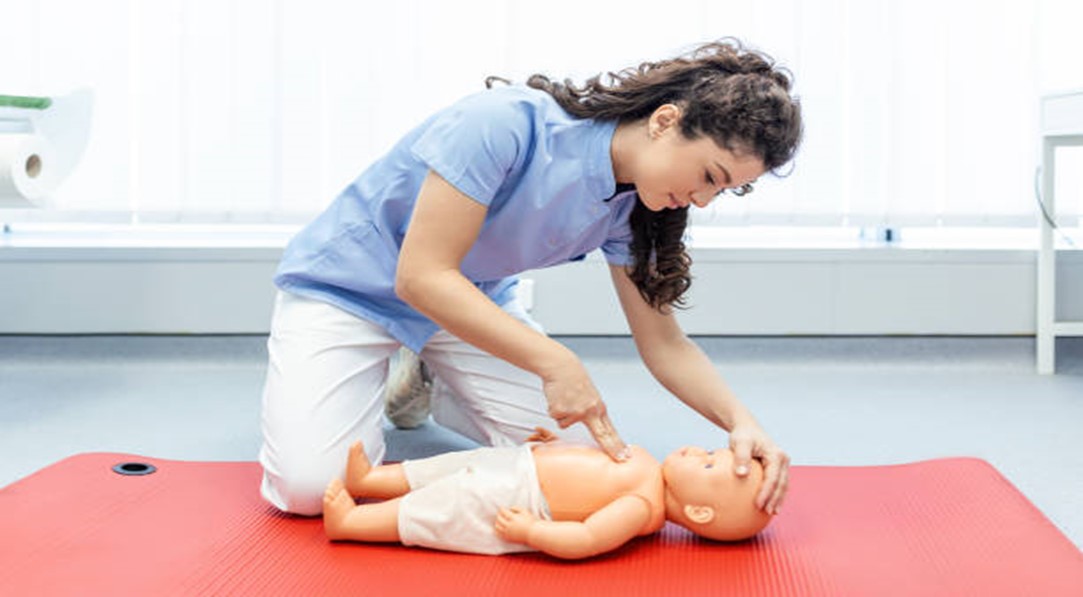
Stroke the baby’s foot and shout to check if they respond.
If unresponsive, call for help and have someone arrange medical assistance.
OPEN THE AIRWAY
Gently tilt the head back and lift the chin to open the airway.
Be very gentle, the infant’s neck is fragile.
Place two fingers on the sternum between the nipples.
Push down about 1/3 of the chest depth (approximately 4 cm / 1.5 inches).
Perform 30 compressions at a rate of 100–120 per minute.
Let the chest fully rise between compressions.
Cover the baby’s mouth and nose with your mouth, forming a tight seal.
Give 2 gentle breaths, each lasting about 1 second, and watch for chest rise.
Repeat the cycle of 30 compressions, 2 rescue breaths.
Continue until:
The baby starts breathing normally, or
Medical help arrives and instructs you to stop.
If the baby starts breathing, place them on their side with head slightly tilted back to keep the airway open.
Continue to monitor Airway, Breathing, and Circulation (ABC).
KEY POINTS TO REMEMBER
Only two fingers are used for chest compressions.
Depth should be about 1/3 of the chest.
Always try to give rescue breaths, hands-only CPR is not as effective for infants.
Keep calm and perform CPR steadily, infants are very fragile, and careful technique is critical.
GENERAL KNOWLEDGE ABOUT CPR
If a person has not started breathing after 30 minutes of continuous compressions, it is unlikely they will survive.
Do not breathe forcefully into the victim.
Forceful breaths can cause vomiting and complicate CPR.
You can take turns with another person performing chest compressions to avoid fatigue.
Switch every 200 compressions during hands-only CPR, but do not stop compressions while switching.
Two people can kneel on either side of the victim; as soon as one finishes 200 compressions, the other continues immediately.