• Driver – A person who has undergone training on how to handle a motor vehicle on the road without causing accidents or collisions. He/she must have a valid driving license.
• Driving – An act of handling a motor vehicle on the road without causing accidents or collision.
• Goal of driver training – (why drivers come to school) – This is to ensure they are equipped with the right knowledge and skills on how to handle a motor vehicle on
the road without causing accidents, collisions or obstruction.
WHAT WE TEACH OUR STUDENTS TO BECOME EXCELLENT DRIVERS
• We train professional way by gauging the student’s progress, and you can help the student practice the material covered by the instructor.
• We encourage you to anticipate trouble. If our student is about to make a left turn at a two-way stop sign and an oncoming vehicle is traveling very fast, we advise your student to wait and see whether the vehicle is going to stop or not before turning.
• We have to practice difficult moves. When you have a hard time merging into traffic, we find a quiet road and practice.
• We show you how to drive a safe distance behind other vehicles by following the four-second rule and reminding you to check this distance frequently at different speeds.
• We teach you to be aware of blind spots; both the yours and those of other vehicles and have you speed up or slow down to get out of other vehicles’ blind spots.
• We teach you importance of safety belts and how they have prevented most of the brain injuries caused by highway crashes each year.
• We teach you what to do in case of a collision, reviewing the steps suggested by the family’s insurance company.
• We teach you to carry important documents like a valid driver’s license, valid insurance certificate and vehicle registration whenever driving?
• We teach you what to do if stopped by a police officer and discuss these matters thoroughly.
• We emphasize the importance of attitude when behind the wheel. If you recognize the importance of protecting everyone’s safety when on the road, you will be more likely to exercise good judgment in road decisions.
• Of course, learning to drive does not begin with a learner’s permit. Children learn attitude and judgment from their parents throughout their lives. We set a good example for our own courteous driving.
WHAT WE LEARN IN THEORY CLASS
• Model Town Board (M.T.B)
M – Model/ Modern
T – Town/ Traffic / Theory
B – Board
• Traffic Signs (Two charts with three sections of signs on the wall)
• General knowledge (like the one you are reading on this website)https://teacherdavidglobal.com/driving-theory-book/
• We write notes and reason together about good and bad actions on the road.
CAUSES OF ACCIDENTS
• Over speeding
• Overlapping
• Overloading
• Overtaking
• Bad roads
• Poor weather i.e., foggy, dusty, mist, heavy rainfall
• Use of drugs. Prescribed or otherwise
• Driving non-roadworthy vehicles
• Ignorance of traffic rules and signs
• Careless driving
• Level of emotions i.e., stress
• Distractions i.e., handheld devices
ONE-WAY TRAFFIC ROAD
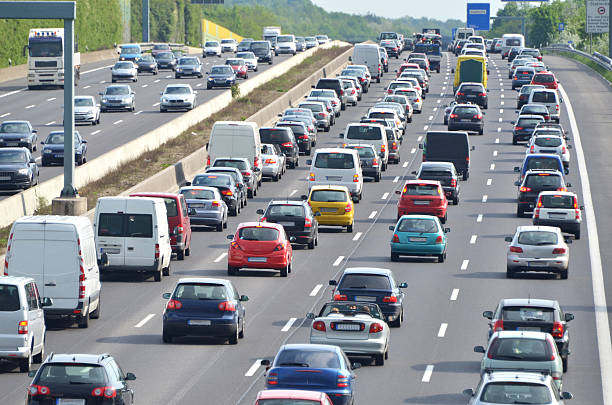
• This is a road with more than two lanes where the traffic
moves to the same direction. This road is divided into lanes
by white broken or continuous lines and the pavement at
the Centre.
• In this road we change lane but not overtaking though it
seems and referred to as overtaking.
• White continuous line means we cannot change lane
(maintain your lane, stick to your lane, stay in your
lane).
• White broken line means you can change lane towards
direction of your choice but only when the road is clear.
Change lanes at your own risk.
• We use M.S.M technique when changing lanes.
M – Mirror
S – Signal / indicate
M – Maneuver (move towards direction of your
choice)
TWO-WAY TRAFFIC ROAD
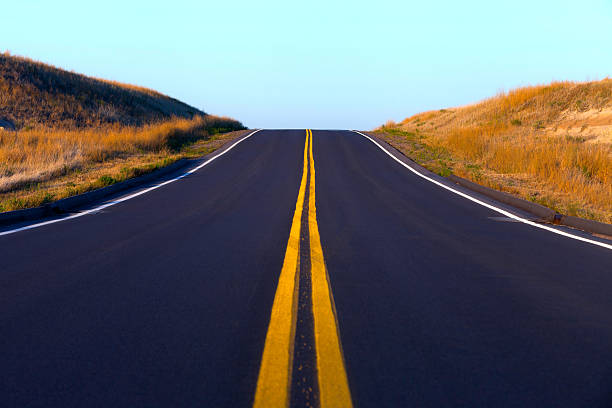
• This is a road with two lanes, single lane per side where the traffic moves in opposite direction.
• This road is divided into two by a single/or double yellow
continuous or broken line.
• In this road, we overtake. (Overtaking means getting out of
your lane, to opposition lane then back to your lane)
• Yellow continuous line means we should not overtake at
that point.
• Yellow broken line means that we one can overtake a
slow-moving vehicle only when the road is clear on the
opposition side ahead.
• Yellow double continuous line means one should not
overtake.
• Yellow double continuous and broken line together
means that the one at broken line can overtake while the
one at continuous line should not overtake.
MOTOR VEHICLE DRIVING
• A vehicle is a self – propelled conveyance with wheels and a motor, such as a car or truck, for use on roads.
• A road vehicle driven by a motor or engine, especially an internal – combustion engine.
SIX MAIN PARTS OF A MOTOR VEHICLE
• Steering Wheel.
• Gears.
• Brakes.
• Clutch.
• Accelerator.
• Mirror.
STEERING WHEEL
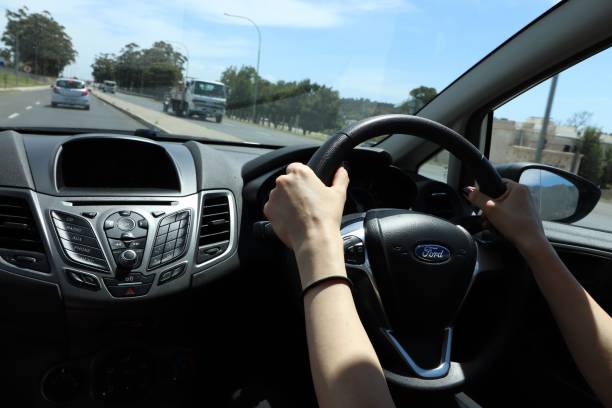
• Controls the Movement of a motor vehicle in a particular direction.
GEARS
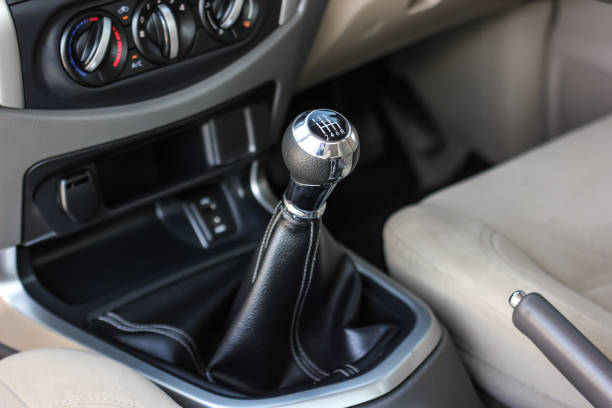
• A gear is a simple machine with teeth that increases the force needed to push or pull something.
BRAKES
• A device for arresting or preventing the motion of a mechanism usually by means of friction.
CLUTCH

• A clutch is a mechanical device that engages and disengages power transmission especially from driving shaft to drive shaft.
• A clutch connects and disconnects two rotating shafts (drive shafts or line shafts).
• The main function of clutch is to engage and disengage the engine to transmission, when the driver needs or during shifting of gear.
ACCELERATOR
• An Accelerator is a pedal in a vehicle that is pressed down to make the vehicle go faster.
• The Accelerator in a car or any vehicle controls the Flow Rate of the fuel into the Combustion Chamber.
• The function of an accelerator in a car is to increase the speed of the car.
MIRRORS
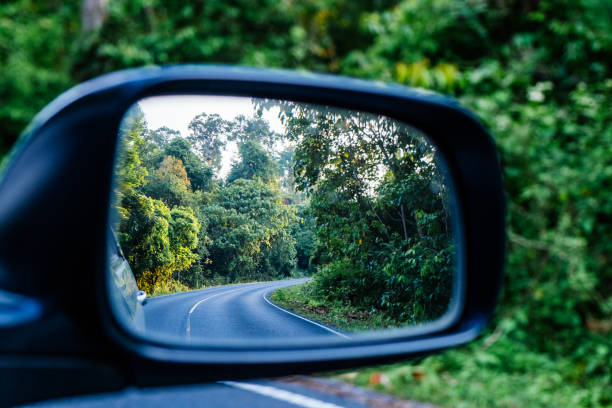
• A car has a number of mirrors and while it is obvious that they are meant to reflect the different activities happening around the car as you drive.
• The steering wheel should have a full range of motion i.e.; it should be able to turn at 360 degrees. It should also
effectively turn the front wheels.
INDICATORS
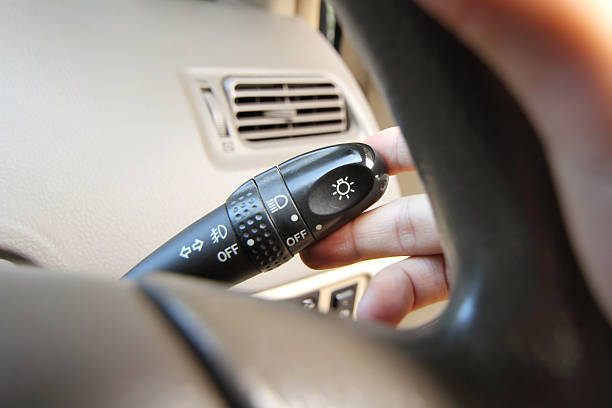
• Inspect all indicators to make sure that they are operational
GEARS
• Ensure that the vehicle is capable of shifting into any gear.
MOTORCYCLE RIDING
HOW TO START A MOTORCYCLE
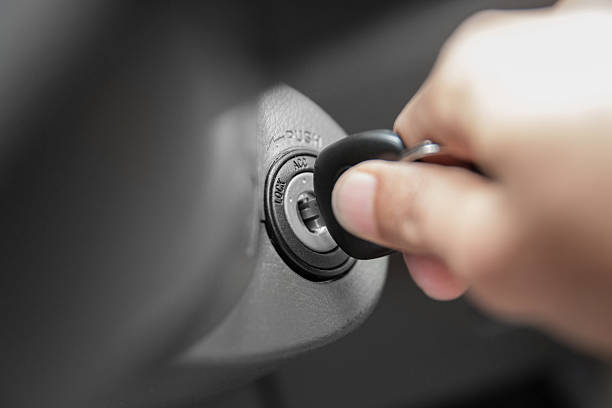
• Insert key to ignite.
• Turn the key on and check if the neutral light is on.
• If the light is not showing, lower to the Neutral gear.
• Kick to start the engine or press to start button.
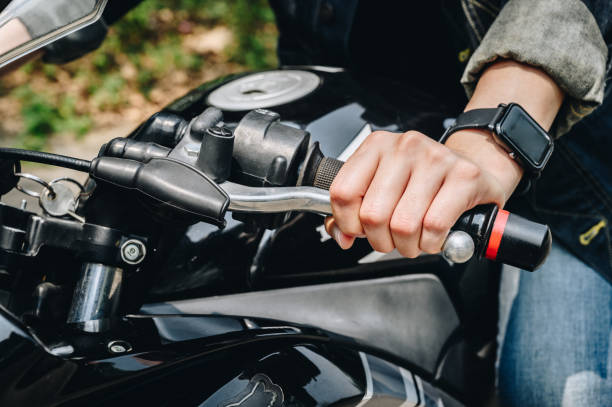
• Now hold the clutch in on the left of the handle and
engage gear Number 1 with the left foot.
• Release the stand and accelerate as you release the clutch
slowly.
• After you balance on the road release the clutch
completely and accelerate.
CHANGING GEARS UP
• Release the accelerator and press the clutch
• Engage gear Number 2 by pulling one step up
• Release the clutch slowly and accelerate again
CHANGING GEARS DOWN
• Release the accelerator and hold the clutch
• Press down the gear from gear Number 3 to number 2 and
release the clutch and accelerate, if necessary, repeat the
same process to lower to the lowest gear you want.
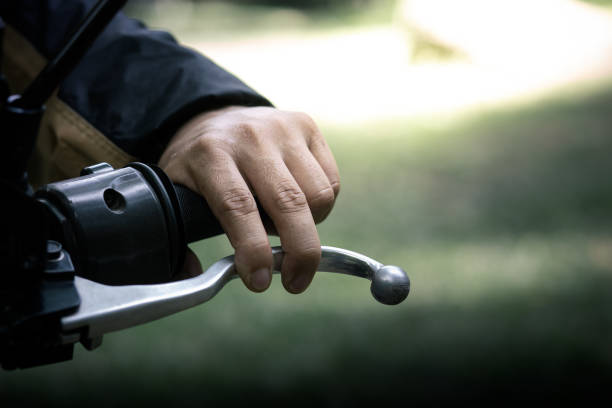
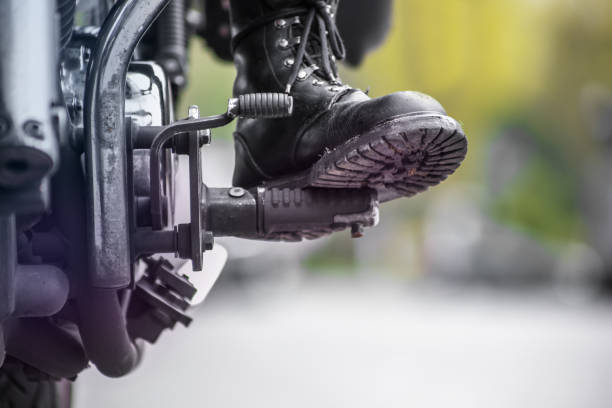
BRAKING
• On a motorbike, there are two brakes, one on the foot and
another on the hand.
• Release the accelerator and hold on the gear to disconnect
it from the engine.
• Use the foot brake to stop the bike smoothly.
• How to switch off the motor bike
• Press the clutch then the brake
• Return the gear to neutral, switch headlights off as you
support the cycle by stands.
• Turn off the ignition and remove the key from the ignition
and alight.
NB: The handbrake on a motorcycle is ONLY used when the
foot brake is not being used.
PARKING
• This is a place set aside by government or individuals wherethe vehicles are placed or kept stationary.
• We have two types of parking;
• Angle parking: secure parking, controlled parking, ample parking
• These types of parking are found at supermarkets, malls, hospitals, etc.
• Flush parking: parallel parking, direct parking, stage parking, unsecure parking, uncontrolled parking
• This is the parking found on the left side of traffic and mostly on the two-way traffic road.
RULES OF ANGLE PARKING
• Park from the furthest end
• Park saloon vehicles only
• Park at an angle of 45°
• Park by forwarding and exit by reversing
RULES OF FLUSH PARKING
• Park from the furthest end.
• Park at your own risk.
• Park by reversing and exit by forwarding.
• Park for a short period of time.
• Park at an angle of 90°
• We have a space for entry but one should leave his/her space for exit.
• Park all types of vehicles except trailers and tractors.
NB: Trailers and tractors are parked mostly on the green fields along two-way traffic.
When your teacher/examiner tells you to drive a certain vehicle at a certain speed, it means you should take to the parking.
This depends with their speed limit on the highway.
• Saloon vehicle – 110kph
• Lorry – 80kph
• Pickups – 80kph
• Trailer – 65kph
• Tractor – 45kph
NB: All commercial vehicles speed limit on highways is
80kph
GEARS
• A gear is a machinery in a vehicle such as a car or truck that
you use to go comfortably at different speeds.
TYPES OF GEARS
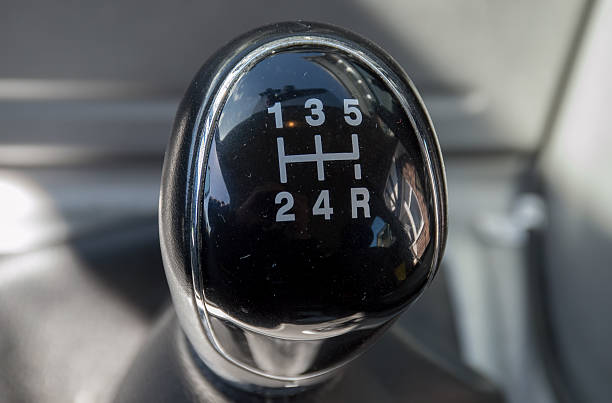
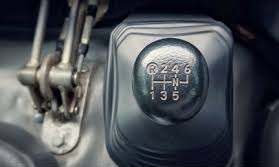
• Neutral gear (N) – This is the gear engaged when switching
on/ off a motor vehicle.
• Gear no.1 – This is the starting gear when one wants to
move the motor vehicle forward.
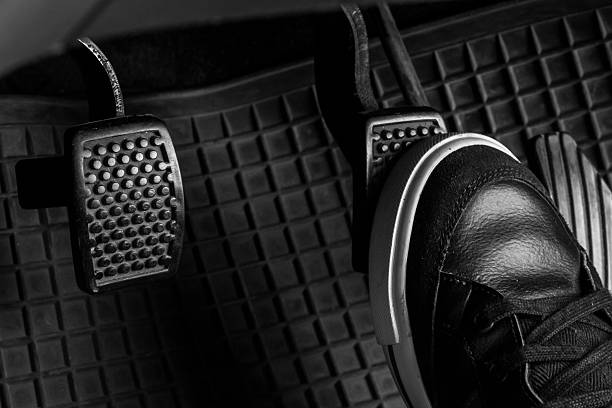
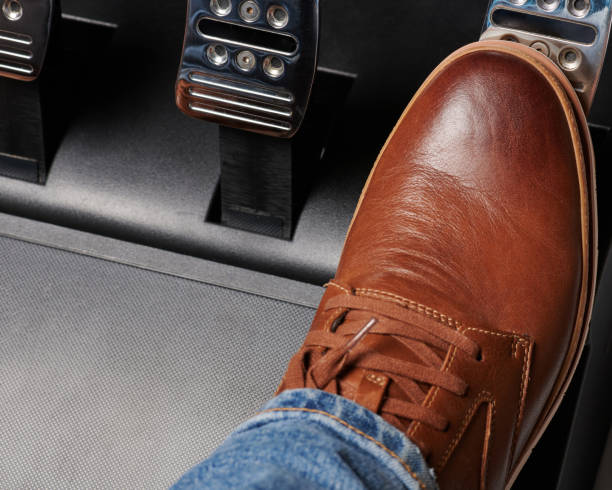
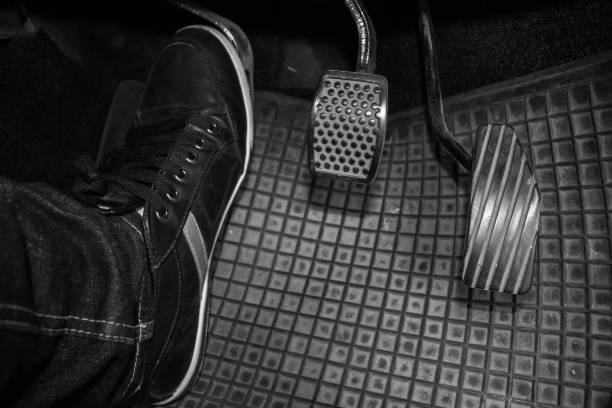
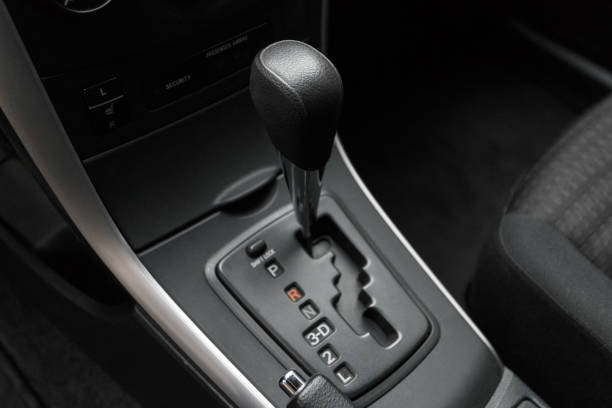
• Reverse gear (R) – This is the gear that is used to move the
vehicle behind. There are three pedals in a manual car
(Clutch, Brakes Accelerator) and two in an automatic car
(Brakes & Accelerator)
• Accelerator -This is a foot pedal found on your right foot in
a motor vehicle and it determines the speed of a vehicle,
when the accelerator is pressed it accelerates.

• Brake – This is a foot pedal found between the accelerator
and the clutch pedal. It is common in all types of vehicles
and it is used to slow down or to stop the vehicle.
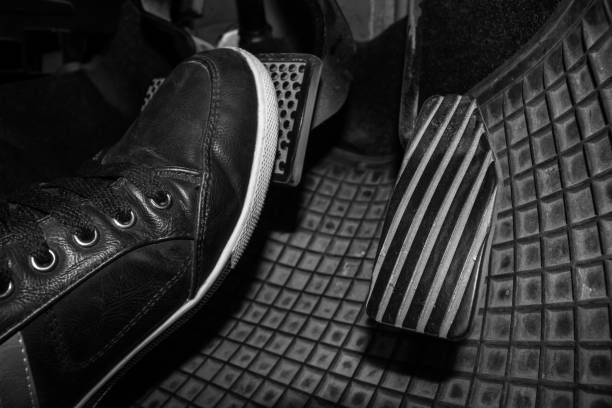
• Clutch -This is a foot pedal found on the left foot in a motor
vehicle. It is only found in manual motor vehicles.
USES OF CLUTCH
• When: Switching ON the motor vehicle, clutch completely
in
• Gears should be neutral/ free
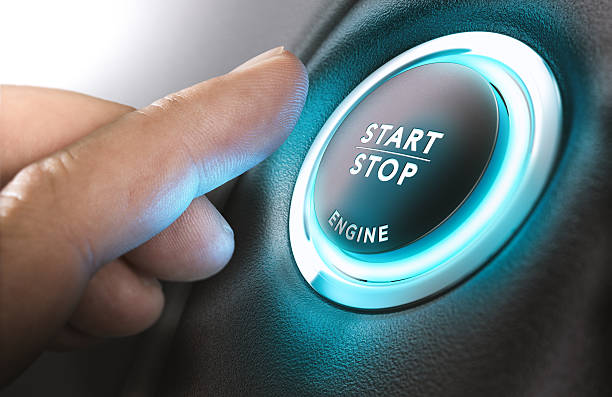
• Turn the ignition switch clockwise to start.
STARTING TO MOVE THE MOTOR VEHICLE
• After switching on the vehicle:
• Check if the road is clear
• Clutch completely in
• Put the starting gear No.1
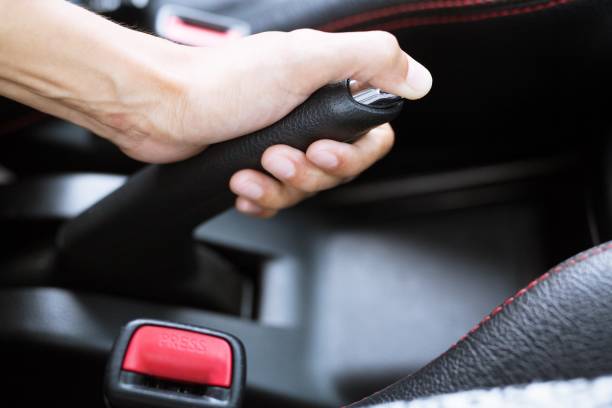
• Pull the hand brake down
• Indicate on the direction you want to take while checking
on the mirror if the road is clear.
• Release the clutch slowly and gradually.
• Press the accelerator slowly and gradually.
CHANGING GEARS
• Release accelerator
• Immediately press the clutch completely
• Change to the appropriate gears
• Release the clutch slowly
• Continue pressing the accelerator
NB: The act of changing the gear should be fast to make
sure the car remains in motion. Do not look at the gear
when changing the gear; one should look at the road.
STOPPING THE MOTOR VEHICLE
• Release the accelerator
• Press the clutch in completely
• Press the brakes in slowly and gradually
HILL START IN MANUAL VEHICLES
• If you have already stopped and you have your handbrake
on.
• Push in the clutch
• Select the correct gear (usually first as it has the lower ratio
to give you the power to start moving against gravity)
• Press the throttle until you have at least 2000rpm showing.
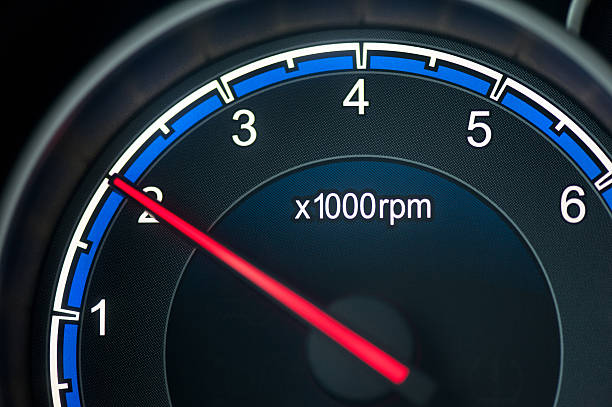
You might need more – it depends on how steep the hill is
and how much torque your vehicle has.
• Keep your right foot steady while you bring up the clutch
until you feel it ‘biting’.
• This is the point where you will feel a bit of vibration
through the clutch and the engine tone might start to
change.
• Release the handbrake and the car will start moving
forwards.
• Bring the clutch up slowly while simultaneously adjusting
the throttle to achieve the acceleration that you need.
• You might need to give it less if you have given it too much
to start with.
HILL START IN AUTOMATIC VEHICLES
• Apply the handbrake
• Put it in D and give it some throttle
• Release the handbrake and you will move forwards.
DOWNHILL START
• Hold the brake and clutch down with both feet.
• Start the car and shift into first gear.
• Release the handbrake slowly and grip the steering wheel.
• Release the foot brake and clutch at the same time, slowly.
• Use the accelerator to bring the car up to your desired
speed.
THREE POINT TURN
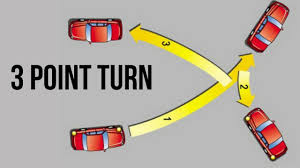
• Move to the outer part of the lane
• As you near the area in which you plan to practice a three point turn for the first time, move to the outer part of the lane.
• This will create more room in which you can maneuver your
vehicle.
• Check your rearview mirror
• Before stopping, check your rearview mirror for traffic. Do
not attempt a three-point turn on a busy roadway.
• Check for other cars behind or in front of you.
• Stop your vehicle. Again, check for any other cars either
behind or in front of you.
POINT 1:
• ← Turn your steering wheel all the way to the left, approach
the edge of the opposing lane after stopping and ensuring
there are no other vehicles approaching in either direction
turn your steering wheel all the way to the left and
accelerate your vehicle until it nears the edge of the
opposing lane. This is the first point.
POINT 2:
• ↓ Shift into reverse → turn your steering wheel to the right
and back up towards the side of the road you originally
started in quickly check again for traffic. Shift your vehicle
into reverse. Using your rear view and side mirrors, slowly
turn your steering wheel to the right and begin to back
your vehicle towards the edge of the side of the road you
originally started in. This is the second point.
POINT 3:
• ↑ Shift back into forward and steer left to begin driving in
the lane opposite of the one you started in Check for
approaching vehicles once more. Shift your car back into
forward and steer left so that you begin driving in the lane
opposite of the one you started in. This is the third point
and the conclusion of the three-point turn driving
maneuver.